


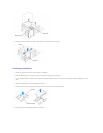
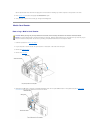
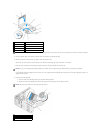
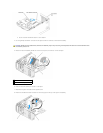

3. Remove any cables from the cable routing clip on the power supply.
4. Remove the four screws that attach the power supply to the back of the computer frame.
5. Press the release button located on the floor of the computer frame.
6. Slide the power supply approximately 1 inch closer to the front of the computer.
7. Lift the power supply out of the computer.
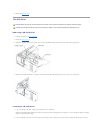
Replacing the Power Supply
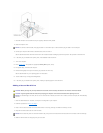
1. Slide the power supply into place.
2. Replace the four screws that secure the power supply to the back of the computer frame.
3. Reconnect the DC power cables.
4. Connect the AC power cable to the connector.
5. Run the cables underneath the clips, and press the clips to close them over the cables.
6. Replace the computer cover.
7. Connect your computer and devices to electrical outlets, and turn them on.
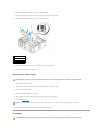
Processor
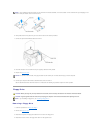
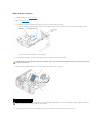
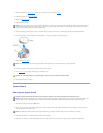
1
release button
2
power supply
3
screws (4)
4
AC power connector
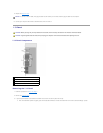
CAUTION: Before you begin any of the procedures in this section, follow the safety instructions in the Product Information Guide.
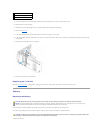
NOTICE: To connect a network cable, first plug the cable into the network port or device and then plug the cable into the computer.
CAUTION: Before you begin any of the procedures in this section, follow the safety instructions in the Product Information Guide.