


Removing the Processor
1. Follow the procedures in "Before You Begin."
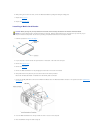
2. Remove the computer cover.
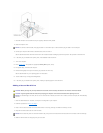
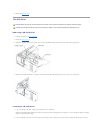
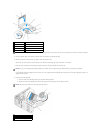
3. If your computer includes a card retention mechanism to secure the x16 card in place from the top:
a. Pivot the mechanism upward and gently press the release tab downward to release the mechanism from the two tab slots holding it in place.
b. Set the retention mechanism aside in a secure location.
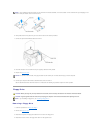
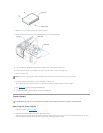
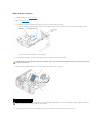
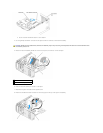
4. Use a long Phillips screwdriver to loosen the two captive screws on each side of the heat-sink assembly.
5. Rotate the heat-sink assembly toward the rear of the computer, and remove it from the computer.
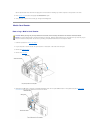
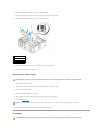
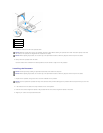
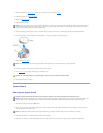
6. Place your finger upon the hook end of the release lever, then push down and out to release it from the tab that secures it
CAUTION: Despite having a plastic shield, the heat-sink assembly may be very hot during normal operation. Be sure that it has had sufficient time
to cool before you touch it.
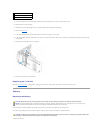
1
heat sink and fan shroud assembly
2
captive screw housing (2)
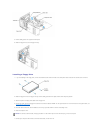
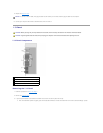
NOTICE: If you are installing a processor upgrade kit from Dell, discard the original heat sink. If you are not installing a processor upgrade kit from Dell,
reuse the original heat sink when you install your new processor.