


58 Installing Enclosure Components
3
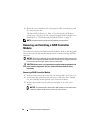
Open the
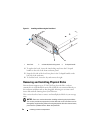
physical disk
carrier handle by rotating it downward.
4
Gently but firmly pull the
physical disk
carrier from its slot while
supporting the weight of the disk from the bottom.
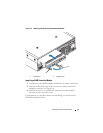
Installing SAS Physical Disks in the Enclosure
NOTICE: To ensure proper airflow for enclosure cooling, each slot should contain
either an active physical disk or a disk blank.
CAUTION: Always wear a wrist grounding strap when handling equipment with
static-sensitive components.
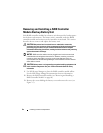
1
Perform the following steps to install the new
physical disk
into the carrier:
NOTE: Data from virtual disks created on a PERC RAID controller cannot be
migrated to an MD3000i or to an MD1000 expansion enclosure connected to an
MD3000i.
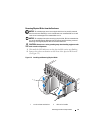
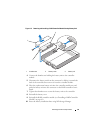
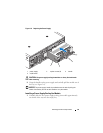
a
If you are replacing a
physical disk
in the carrier, remove the four
screws that secure the disk to its carrier and remove the disk (see
Figure 3-3).
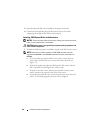
b
Position the replacement
physical disk
into the disk carrier with the
disk’s controller board facing the rear of the carrier.
c
From the rear of the carrier, slide the
physical disk
into the carrier
until it contacts the stop tab at the front of the carrier.
d
Secure the
physical disk
to the carrier using the four screws removed
earlier. To avoid damaging the carrier, do not overtighten.