68 Installing Enclosure Components
2
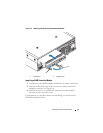
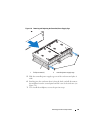
Slide the control panel fully into the slot, making sure that its connector
engages into the matching backplane connector (see Figure 3-7). Also,
make sure the guide tab on the control panel is fully inserted into the
mounting slot on the backplane.
3
Replace the front faceplate and re-attach the 16 screws that hold it in
place.
4
Re-install any
physical disk
s you removed (see "Removing and Installing
Physical Disks" on page 56).
5
Push the enclosure all the way back into the rack and tighten the
thumbscrews.
6
Reconnect power cables to the enclosure and power it back on.
7
Power on the host server.
Removing and Installing the Midplane
CAUTION: Only trained service technicians are authorized to remove the
enclosure cover and access any of the components inside the enclosure. Before
performing any procedure, see your Product Information Guide for complete
information about safety precautions, working inside the enclosure and protecting
against electrostatic discharge.
The enclosure midplane contains the connectors for the physical disks, RAID
controller module, control panel, and power supply/cooling fan modules.
1
Complete the steps in "Removing the Control Panel" on page 66.
2
Remove the RAID controller modules from the
enclosure
. (See
"Removing and Installing a RAID Controller Module" on page 60.)
3
Remove both power supply/cooling fan modules from the
enclosure
. (See
"Removing and Installing the Power Supply/Cooling Fan Module" on
page 64.)
4
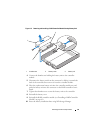
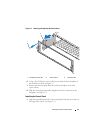
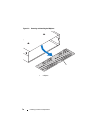
Remove the four Phillips screws holding the controller/power supply cage
in the
enclosure
(see Figure 3-8).


