38 Using the Printer
www.dell.com | support.dell.com
Enlarging or Reducing Images or Documents
If you are using your printer without a computer, you can enlarge or reduce your document by
25, 50, 100, 150, 200 percent, and Fit-to options using the operator panel.
If you are using your printer with a computer, you can enlarge or reduce your document between
25–400 percent using the Dell All-In-One Center.
Enlarging Images Using Your Operator Panel
1 Load the paper with the print side facing up. For more information, see "Loading Paper" on
page 28.
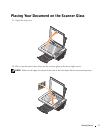
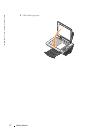
2 Place your document or photo on the scanner glass and make sure the upper left corner
aligns with the arrow on the printer. For more information, see "Placing Your Document on
the Scanner Glass" on page 31.
3 Press the Mode button on the operator panel until you see Copy Mode on the display.
4 Press the Preview button to preview your document or photo.
5 Press the Resize button.
6 Use the navigation buttons to select the size you want your copy to be, and then press
Select.
7 If you want to make more than one copy, press the left or right arrow on the operator panel
to select the number of copies (1–99).
8 Press the up or down arrow to change the blank paper size.
9 Change any copy settings. For more information, see "Operator Panel Menus" on page 18.
10 On the operator panel, press the Color button to create a color copy or press the Black
button to create a black and white copy.
Copying appears on the display.
Enlarging Images Using Your Computer
1 Load the paper with the print side facing up. For more information, see "Loading Paper" on
page 28.
2 Place your document or photo on the scanner glass and make sure the upper left corner
aligns with the arrow on the printer. For more information, see "Placing Your Document on
the Scanner Glass" on page 31.
3 Click Start→Programs or All Programs→Dell Printers→Dell Photo AIO Printer
942→ Dell All-In-One Center.
The Dell All-In-One Center appears.


