46 | Removing and Replacing Parts
www.dell.com | support.dell.com
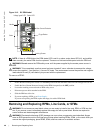
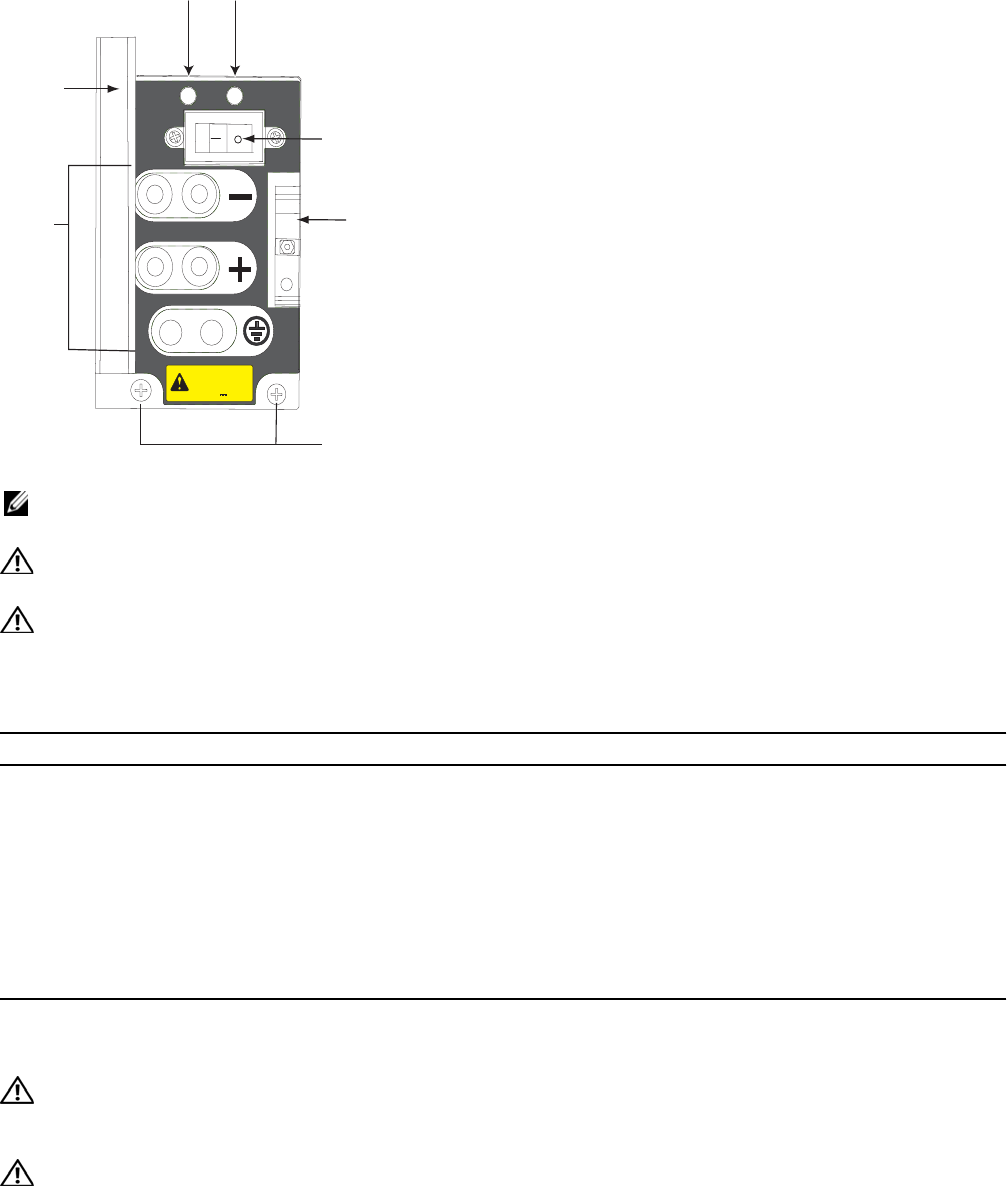
Figure 10-3. DC PEM Label
NOTE: If there is a PEM failure (the PEM status LED is not lit or amber, major alarm LED is lit, and audible
alarm sounds), the entire PEM must be replaced. There are no field serviceable parts inside the PEM unit.
WARNING: Do not remove the PEM safety cover until the power supplied by the remote power source is
OFF.
WARNING: To be completely sure that power has been turned off, use a voltmeter to measure the voltage
across the negative (-) and positive (+) source DC leads. The measurement across the positive and negative
leads should be zero (0) volts before you proceed with the replacement.
To remove a PEM:
Removing and Replacing RPMs, Line Cards, or SFMs
WARNING: Do not remove a panel blank unless you are ready to install a line card, RPM, or SFM into that
slot. If you remove a card, immediately replace the empty slot with a panel blank. Blanks are required to
control airflow and electromagnetic interference.
WARNING: Electrostatic discharge (ESD) damage can occur when components are mishandled. Always
wear an ESD-preventive wrist or foot-heel ground strap when handling RPMs, SFMs, or line cards. After you
remove the original packaging, place RPMs, SFMs, and line cards on an antistatic surface.
Step Task
1 Ensure that the remote power source is in the OFF position and that the PEM status LED and Voltage LED are off.
2 Switch the Over Current Protector (located on the PEM front panel) to the OFF position.
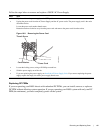
3 Loosen the retaining screw and remove PEM safety cover.
4 Disconnect power cables attached to the PEM.
5 Slide the PEM out of the slot.
6 If you are replacing a PEM, go to
Power Supply
.
If you are not replacing the PEM, replace the empty slot with a PEM blank.
48V in
48V in
Status
Status
-48/-60Vdc 75A
-48/-60Vdc 75A
CAUTION -
CAUTION -
Use copper
Use copper
conductors only
conductors only
CC-E600-PWR-DC
Voltage 'good' LED
Status LED
Studs
Over Current Protecto
r
Finger Barrier
Locking Screws
FN00095a
Handle


