


Basic Troubleshooting 2-9
kit connected to the computer as shown in Figure 2-1 and described in the fol-
lowing procedure.
The diskette-based diagnostics contains the same tests as the hard-disk–
based diagnostics. These tests aid in troubleshooting all major components
of the system.
&$87,217RSUHYHQWGDPDJHWRWKHRULJLQDOGLDJQRVWLFVGLVNHWWH
DOZD\VXV HDEDFN XSFRS\ RIWKHGLD JQRVW LFVGLVNHWWHZKHQVHUYLFLQJ
DXVHU·VFRPSXWHU'HOOUHFRPPHQGVWKDWXVHUVPDNHVHYHUDOFRSLHV
RIWKHRULJLQDOG LVNHWWHWRHQVXUHWKDWRQHLVDOZD\VDYDLODEOH
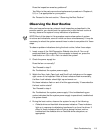
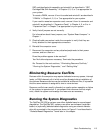
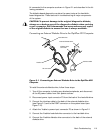
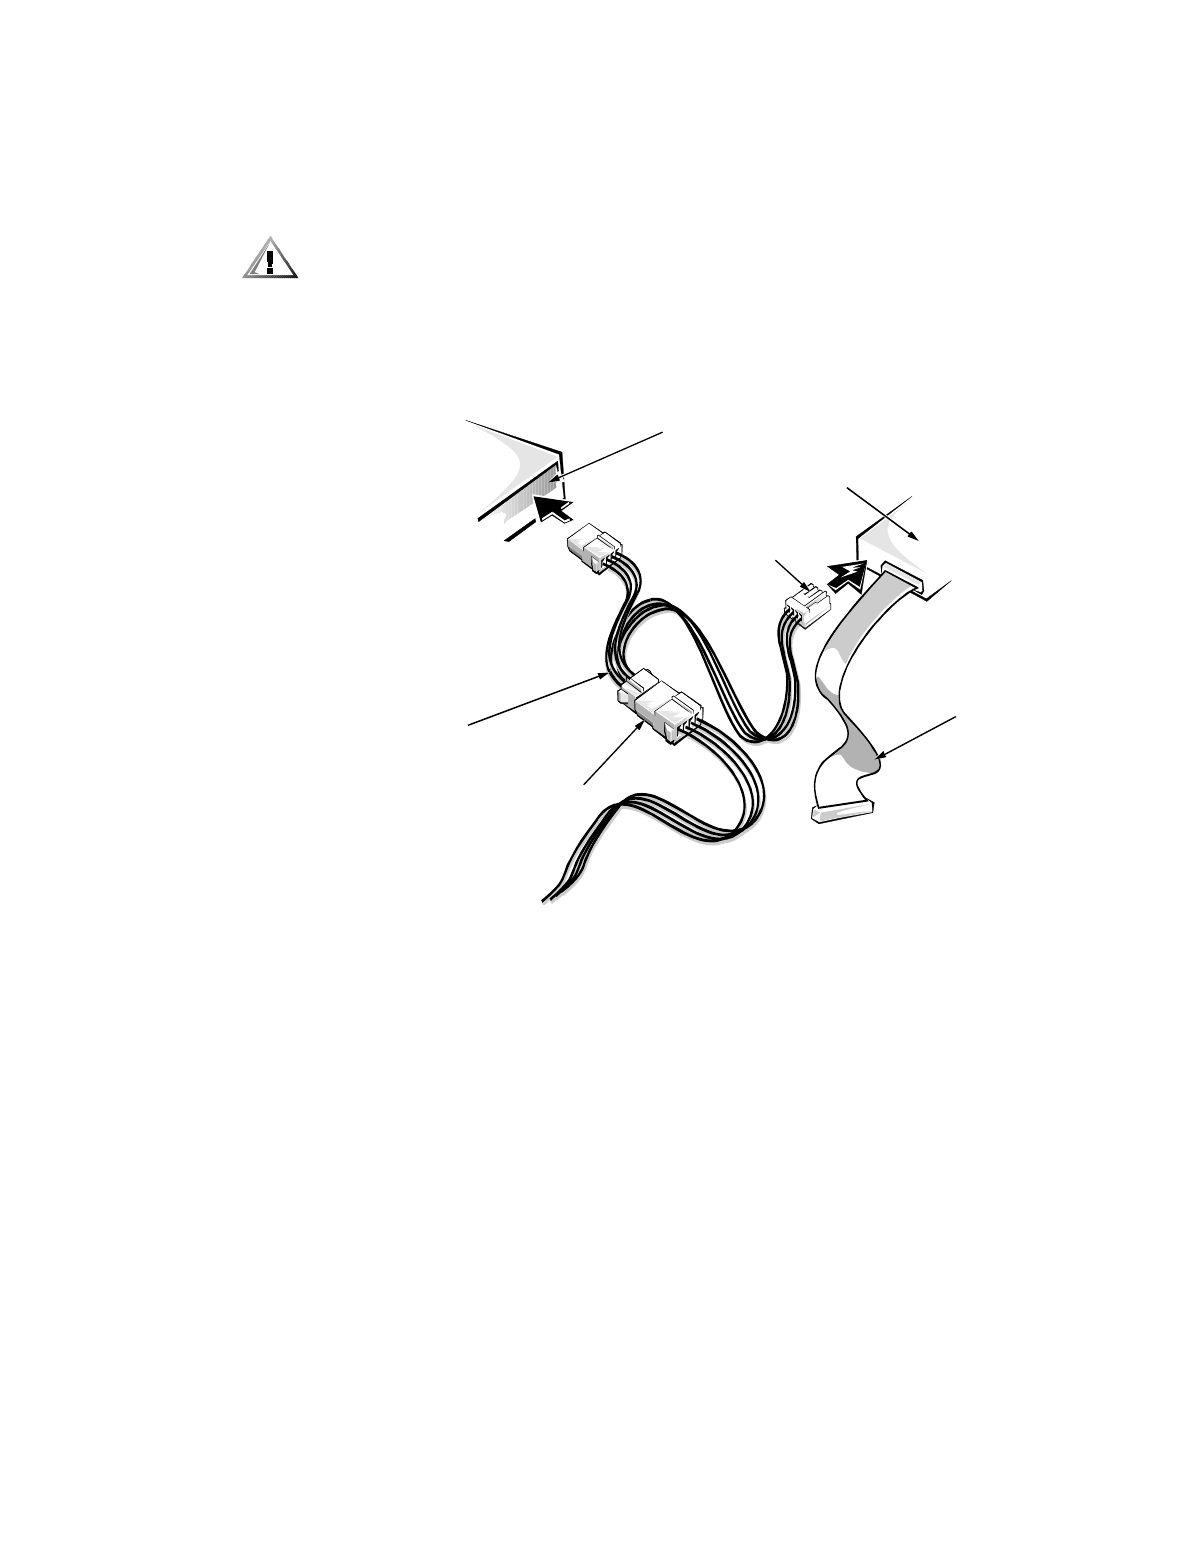
&RQQHFWLQJDQ([WHUQDO'LVNHWWH'ULYHWRWKH2SWL3OH[1;&RPSXWHU
)LJ XUH&RQQHFWLQJDQ([WHUQDO'LVNHWWH'ULYHWRWKH2SWL3OH[1;
&RPSXWHU
To install the external diskette drive, follow these steps:
1. Turn off the computer, including any attached peripherals, and disconnect
all the AC power cables from their power sources.
2. Disconnect power input connector P3 from the back of the hard-disk drive.
3. Connect the interface cable to the back of the external diskette drive
(see Figure 2-1) and to the DSKT connector on the system board (see
Figure 1-12).
4. Attach the Y-cable to power input connector P3 as shown in Figure 2-1.
5. Connect the Y-cable’s hard-disk drive connector to the hard-disk drive.
6. Connect the Y-cable’s diskette drive connector to the back of the external
diskette drive.
P3 connector
hard-disk drive
Y-cable
external diskette drive
interface cable
diskette drive
connector