


Epson Stylus CX5800F
14 8/05
18. Press the keys on the numeric keypad to enter your fax
number. You can enter the numbers 0 to 9, and the
characters * and #; up to 64 digits total.
19. Press the
OK button.
20. Press the y
Cancel/Back button until you return to the first
screen.
Selecting the Paper Size
Before you receive a fax, be sure to load plain paper and set the
Paper Size setting to the size of paper you’ve loaded. Also
make sure the
Automatic Reduction setting is set to receive
faxes in the desired size. See the next section for details.
Selecting Send/Receive Settings
If you want to set up a speed dial list, speed dial a fax number,
create a fax header, or customize your fax preferences, you can
change the fax settings.
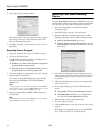
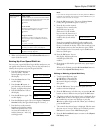
1. Press the
Fax button once to enter Fax mode. The Fax
button lights up and you see this display:
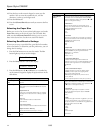
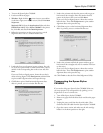
2. Press the
Setup button. You see this display:
3. Press the
OK button, the u or d button, or a number key
on the numeric keypad to display the options shown in the
table below.
Setting Options and descriptions
1.Select Speed
Dial
For instructions on speed dialing a fax number, see
page 16.
2.Print Report
To print fax information reports, select one of
these options, then press the
OK button to print
the report.
1.Speed Dial List
Prints a list of the speed dial entries you created.
See page 15 for instructions on creating a speed
dial list.
2.Fax Log
Prints information about the last 30 fax
transmissions.
3.Last Transmission
Prints information about the last fax transmission.
4.Reprint Faxes in Memory
Reprints all the faxes currently in memory.
3.Speed Dial
Setup
See page 15 for instructions on creating a speed
dial list.
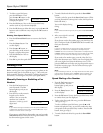
Enter Fax Number
1.Select Speed D
4.Scan&Print
Setup
To change various settings, press the OK button,
then select one of these options. Press the
OK
button to select the option, then press the
u or d
button to change the setting.
1.Resolution
Adjusts the fax quality for the original you’re
faxing. (You can also select the fax resolution by
pressing the
Fax button twice.)
Standard (default)
Fine
Photo
2.Contrast
Adjusts the contrast for the original you’re faxing.
(You can also select the fax contrast by pressing
the
Fax button three times.)
Normal (default)
Light
Dark
3.Paper Size
Indicates the size of the paper loaded in the Epson
Stylus CX5800F for printing received faxes.
Letter (8.5 × 11; default)
Legal (8.5 × 14)
A4 (8.3 × 11.7)
4.Automatic Reduction
Indicates whether large received faxes are
reduced in size to fit on the selected Paper Size or
printed at their original size on multiple sheets.
On (default)
Off
5.Last Transmission Report
Indicates whether or when the Epson Stylus
CX5800F prints a report for outgoing faxes.
Off (turns off report printing)
On Error (prints reports only when an error
occurs; default)
On Send (prints reports for every fax you send)
5.Communication To change various phone settings, press the
OK
button, then select one of these options. Press the
OK button to select the option, then press the u
or
d button to change the setting.
1.Dial Mode
Indicates the type of phone system to which
you’ve connected the Epson Stylus CX5800F.
Tone (default)
Pulse
2.DRD
Indicates the type of answer ring pattern you want
to use to receive faxes. (You must have set up
your phone system to use different ring patterns to
select an option other than
All.)
All (default)
Single
Double
Triple
Double & Triple
(continued)
Setting Options and descriptions