


4.1 ADJUSTMENTS
This section describes the adjustment procedures for the EPL-5500. You must perform these
adjustments after servicing the printer, especially when any component or part is replaced.
4.1.1 Print Position Adjustment
You can adjust the vertical print position on a sheet of paper by turning the image synchronizing
volume control on the main board (C169 MAIN-B). After replacing a main board, be sure to adjust
the print position using the procedure below.
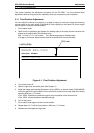
1. Print a status sheet.
2. Check that the registration gap between the leading edge of the sheet and the horizontal line
printed on the page is within the following range:
29.6 ± 2.5 mm (1.17 ± 0.01 inches) for a status sheet page on A4/letter paper:
If the gap is not correct, adjust the print position as described in the next few steps.
3. Turn printer power off.
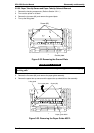
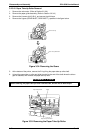
4. Open the right cover and shield plate. (See Chapter 3.)
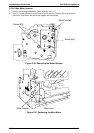
5. Adjust the image synchronizing adjustment volume (VR201) on the main board (C169 MAIN-B)
so that the gap for the print position of the horizontal line (down from the top edge of the sheet)
becomes 29.6 mm (1.17 inches) .
•Turn VR201 clockwise to increase the gap for the print position of the horizontal line.
•Turn VR201 counterclockwise to decrease the gap.
6. Turn on the printer.
7. Print a status sheet again to check the print position.
8. Repeat steps 5 to 7 until the print position is 29.6 mm (1.17 inches).
9. Reattach the shield plate and right case.
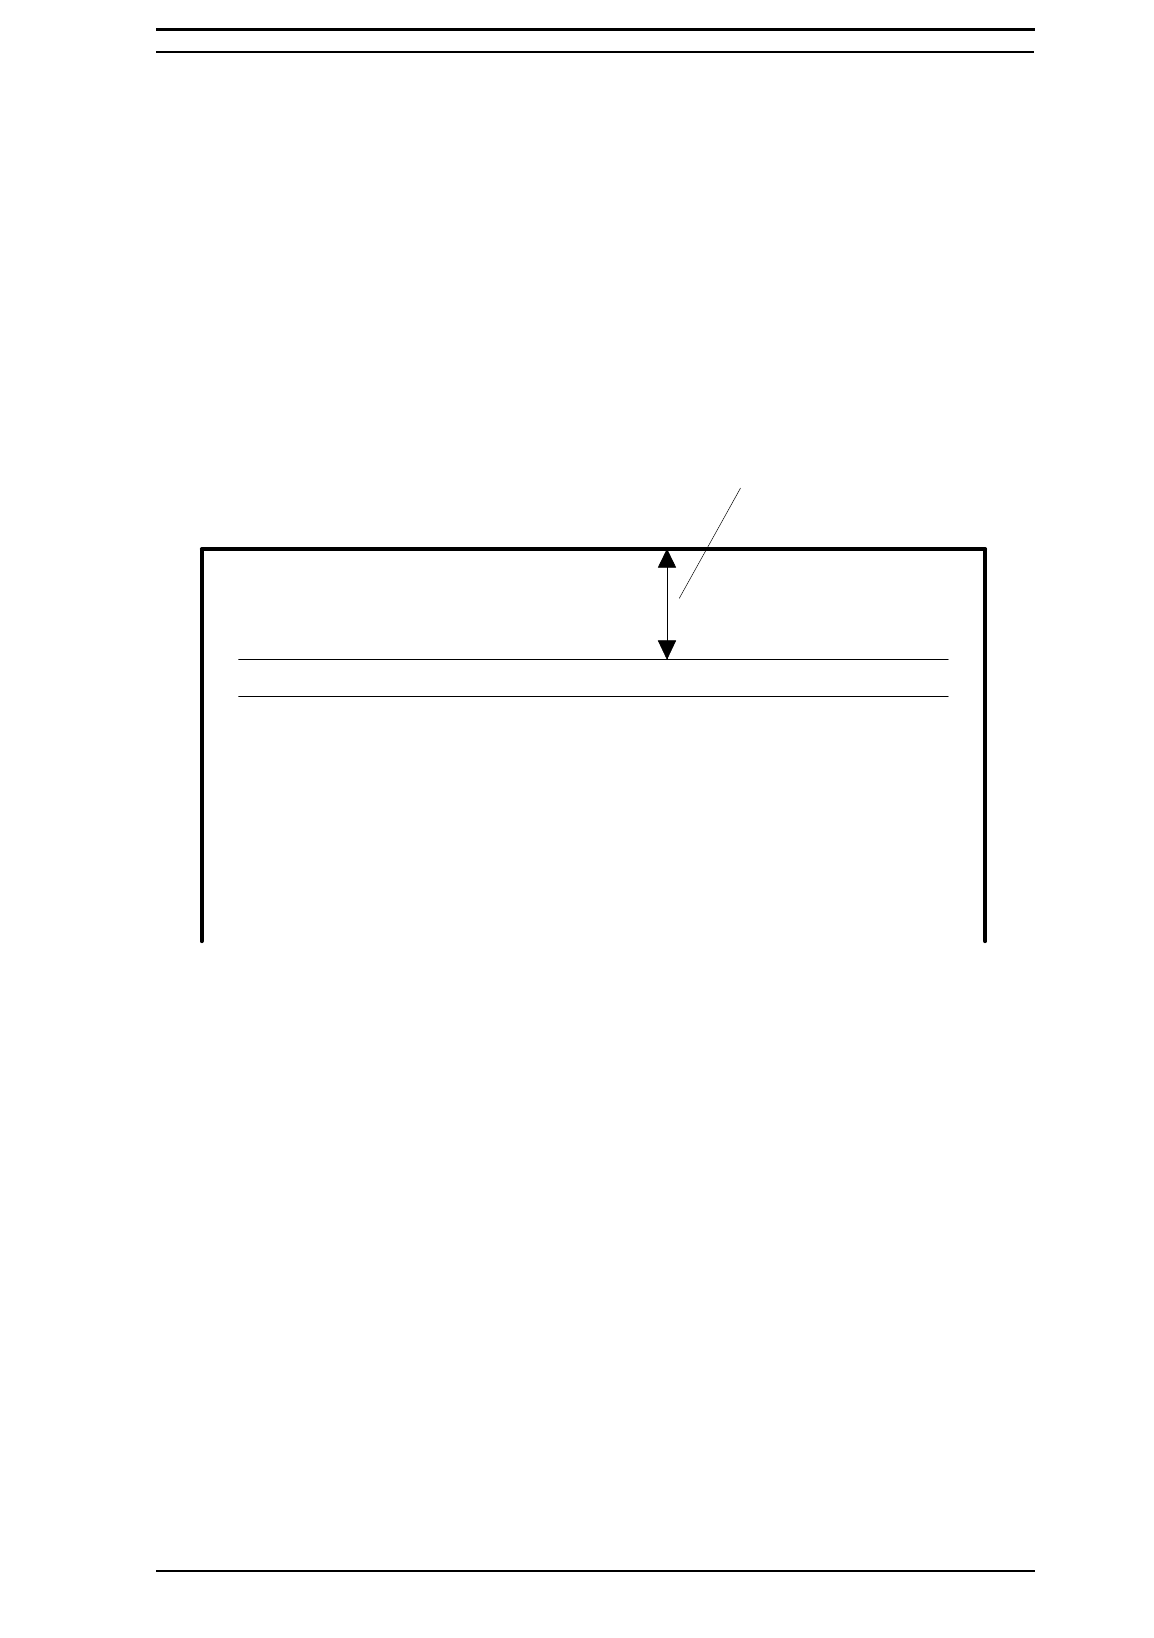
29.6 mm
EPSON EPL-5500
Status Sheet
Default Settings
Leading Edge
Figure 4-1. Print Position Adjustment
EPL-5500 Service Manual Adjustments
Rev. B 4-1