


WARNING
Do not remove the cover unless the printer is turned OFF because
high voltages are present inside the printer when the power is on. Also
do not touch contacts on the circuit board of the printer because many
of the components can be destroyed by the static electricity charge that
may build up on your body.
1. Turn off the power to both the printer and the computer and
unplug the power cable and disconnect the interface cable from the
printer.
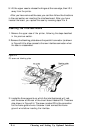
2. Remove the printer or tractor cover, tractor unit, and paper guide.
3. Remove the automatic sheet feeder if one is installed.
4. Remove the ribbon and move the print head to the middle of the
printer.
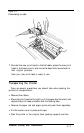
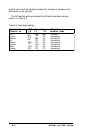
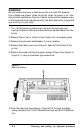
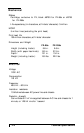
5. Remove the screw holding the upper casing of the printer (shown in
Figure E-1), using a cross-head type screwdriver.
Figure E-I.
Removing the screw
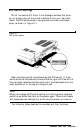
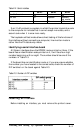
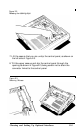
6. Push the retaining clips (shown in Figure E-2) through the holes,
using a screwdriver. The FX-86e has two clips, and the FX-286e has
four.
E-4
Choosing and Setting Up Optional Interfaces