


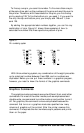
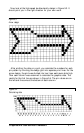


1. The computer is prevented from adding any extra characters by the
WIDTH statement (line 100).
2. The line spacing is changed to 8/72 of an inch-the height of the
dot patterns used in the program (line 110).
3. The program goes through the graphics commands the required
number of times (lines 120 and 170).
4. A new graphics command is used for each line printed (lines 130-
160). This part of the program is similar to the last example, but two
columns are printed each time through the loop making a total of
100.
5. The last important thing to do is to reset the printer to its default
settings, including the normal line spacing (line 180).
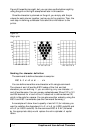
Notice that the graphics command (ESC K) can be in effect for only
one print line. To print more than one line of graphics, the graphics
command must be issued before each line.
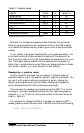
Density Varieties
Although all the examples so far in this chapter have been in the
single-density graphics mode, there are six other eight-pin densities and
two that use all nine pins. Nine-pin graphics is not necessary for most
uses, but you can find the command (ESC ^) in the Epson mode
command summary.
The four most common eight-pin modes are available in both Epson
and IBM printer emulation modes. Their commands are ESC K,
ESC L, ESC Y, ESC Z. In Epson mode, there is also a general-purpose
command for any of the eight-pin graphics modes: ESC *. This
command is used in the same way as the individual commands, except
that before n1 and n2 you must send the code for the graphics mode
required. The different modes are summarized in the table on the next
page.
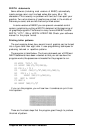
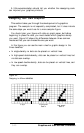
The following example shows how to use the ESC * command to
reserve 40 columns for single-density graphics. This uses mode number
0 from the table to achieve exactly the same effect as the first example
using ESC K.
LPRINT CHR$(27);"*";CHR$(0);CHR$(40);CHR$(0);
5-8
Graphics and User-defined Characters