


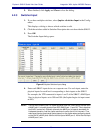
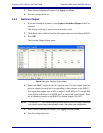

Euphonix SH612 Studio Hub User Guide
25
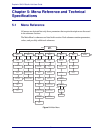
Chapter 4: Integration With Jupiter VM3000
Routers
The SH612 with ES-Control firmware can be controlled by the ES-capable Thomson
Grass Valley Jupiter. This chapter details integrating the SH612 with the Jupiter.
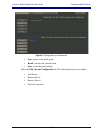
Make sure your SH612 has the ES-Control firmware by watching for ES-Control
Equipped Edition and the firmware revision (with ES after the number) on the second
bootup screen on the LCD display when turning on the SH612.
Your Jupiter system must have the ES Bus Router Control and Third Party Router
Control Unrestricted options enabled. If these are not installed, contact Thomson
Grass Valley to obtain them. Without these options, the Jupiter does not have the capa-
bility to control the Studio Hub.
NOTE: This chapter assumes you have an installed Jupiter router system and are trained to
use it. If you are new to the Jupiter system, consult its documentation and familiarize
yourself with its operation before proceeding with this section.
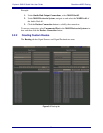
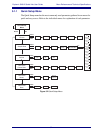
4.1 Connections and Basic Setup
We recommend installing the SH612 in the same rack as the Jupiter VM3000 control
board to minimize cable length and make checking configuration and communication
between the two devices easier.
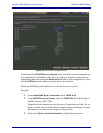
For the SH612 to receive and acknowledge commands from the VM3000, the Control
Port must be set to RS422 (see page 9 for instructions). Make sure to cycle the SH612’s
power off/on after resetting the Control Port.
NOTE: Make sure no control cables are connected to the SH612 or the following procedure
will not be possible.