


Installing Modules and Connecting Cables
BlackDiamond 12800 Series Switches Hardware Installation Guide
102
Distinguishing a BlackDiamond 12800 Series MSM
from an I/O Module
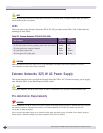
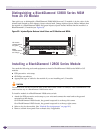
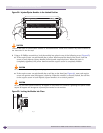
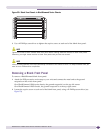
One quick way to distinguish a BlackDiamond 12800 MSM from an I/O module is by the color of the
release latch located on each injector/ejector release latch. Orange injector/ejector latches indicate that
the module is a BlackDiamond MSM, and green injector/ejector latches indicate that the module is a
BlackDiamond I/O module (see Figure 62).
Figure 62: Injector/Ejector Release Latch Colors on I/O Modules and MSMs
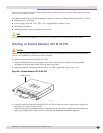
Installing a BlackDiamond 12800 Series Module
You need the following tools and equipment to install a BlackDiamond 12800 series MSM or I/O
module:
● ESD-preventive wrist strap
● #2 Phillips screwdriver
● Appropriate type of cable for the module if you are installing an I/O module
CAUTION
The module series number must be the same as the switch series number. For example, install BlackDiamond 1200
series modules only in a BlackDiamond 12800 series switch.
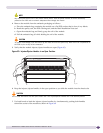
To install a module in a BlackDiamond 12800 series switch:
1 Attach the ESD-preventive wrist strap to your wrist and connect the metal end to the ground
receptacle on the chassis.
On a BlackDiamond 12804 chassis, the ground receptacle is at the top left corner.
On a BlackDiamond 12802 chassis, the ground receptacle is at the top right corner.
2 Select a slot for the module. (See “Module Slot Assignments” on page 101.)
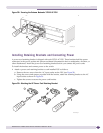
3 Remove a blank front panel from a chassis slot, if applicable.
EX_122
I/O module
release latches
are green
MSM
release latches
are orange