


VSW 2VGA A • Installation and Operation
Installation and Operation
2-2
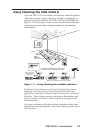
Installation Overview
To install and set up the VSW 2VGA A for operation, follow
these steps:
1
Turn all of the equipment off. Make sure that the video
and audio sources (computers, stereos, tape decks, or other
devices), the VSW 2VGA A, the output devices (projectors,
speakers), and the contact closure control device are all
turned off and disconnected from the power source.
2
If you are going to daisy chain two or more switchers with
VSW I AAP control panels, identify the revision of the
VSW 2VGA A board (for configuring the VSW I AAPs)
and configure the switchers' jumpers. See “Setting the
VSW 2VGA A Jumpers” on page 2-10.
3
If desired, mount the switcher. See “Mounting the
VSW 2VGA A” in this chapter.
4
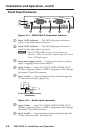
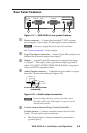
Attach the cables. See “Front Panel Features" and "Rear
Panel Features" in this chapter.
5
Connect power cords and turn on the devices in the
following order: output devices, contact closure controller,
VSW 2VGA A switcher, and input devices.
6
Select an input using the front panel input toggle switch or
the contact closure controller.
7
The image should now display, and sound should be
audible. If not, ensure that all devices are plugged in and
receiving power. Check the cabling and make adjustments
as needed. Select a different input to check for a picture
and sound.
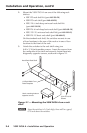
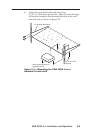
Mounting the VSW 2VGA A
N
If you are going to daisy chain two or more switchers with
VSW I AAP control panels, identify the revision of the
VSW 2VGA A board (for configuring the VSW I AAPs)
and configure the switchers' jumpers before mounting
the switchers. See “Setting the VSW 2VGA A Jumpers”
on page 2-10.
The VSW 2VGA A can be mounted in a rack, or under or
through furniture, using one of the following optional mounting
kits:
• RSF1233inchrackshelfkit(part#60-190-20)
• RSB1233inchrackshelf(part#60-604-20)