xi
Getting Started
Introduction
This section will have you operating Hydra in a matter of minutes. All basic operating
information is covered in this short Getting Started guide. Subsequent chapters of the
manual cover the instrument in more detail.
Note
This manual contains information and warnings that must be followed to
ensure safe operation and retain the instrument in safe condition.
The Basics
Hydra has 21 input channels: channel 0 is on the front panel, and channels 1 through 20
are on the rear input module.
There are two ways Hydra takes measurements (these can be used separately or
together):
• A Scan function, which measures all channels at a specified scan interval.
• A Monitor function, which repeatedly measures any one channel.
The instrument has three different modes of operation:
• Active Mode - when the Scan and/or Monitor functions are on.
• Configuration Mode - when any of the setup parameters are being changed.
• Inactive mode - when the instrument is powered up, and sitting idle (i.e., not in
Active Mode or Configuration Mode).
Turning On the Instrument
Press R ON. The entire display lights up as the instrument steps through a series of
self tests. (Refer to Chapter 6 if any error messages are displayed during this self-test
sequence.) When the self-tests are finished, the instrument resumes whatever mode it
was in the last time power went off.
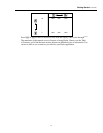
Normally it will go to Inactive Mode, and sit idle with a channel number on the right-
hand display. You can change the displayed channel with G and D. Other annunciators
are lit dimly to provide a summary description of the selected channel’s setup.
The initial setup for all channels should be "off": as you scroll through the channels with
G or D, the "OFF" annunciator should be on dimly. If any of the channels are set up
otherwise, or if the instrument immediately starts taking measurements after the self-test
sequence, then it still contains the previous user’s setup. You can quickly get the
instrument back to the initial setup by performing a "Configuration Reset".
To perform a Configuration Reset, press R OFF. Then hold C in, while pressing
R ON; keep C pressed until the self-test sequence is finished and the instrument
beeps one time.
Setting Up a Channel
1. Press G, D to select a channel to modify. For this example, start with channel 0.
2. Press F to access the function setup menu.
The "SET" and "FUNC" annunciators come on, and the instrument goes into
Configuration Mode. The present function for this channel is also highlighted (for


