26 01-28008-0018-20050128 Fortinet Inc.
Next steps Getting started
Configuration options
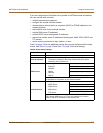
Once you have selected Transparent or NAT/Route mode operation, you can
complete the configuration plan and begin to configure the FortiGate unit. Choose
among three different tools to configure the FortiGate unit.
Web-based manager and setup wizard
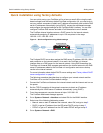
The FortiGate web-based manager is a full featured management tool. You can use
the web-based manager to configure most FortiGate settings.
The web-based manager Setup Wizard guides you through the initial configuration
steps. Use the Setup Wizard to configure the administrator password, the interface
addresses, the default gateway address, and the DNS server addresses. Optionally,
use the Setup Wizard to configure the internal server settings for NAT/Route mode.
To connect to the web-based manager you require:
• Ethernet connection between the FortiGate unit and a management computer.
• Internet Explorer version 6.0 or higher on the management computer.
CLI
The FortiGate CLI is a full-featured management tool. Use it to configure the
administrator password, the interface addresses, the default gateway address, and
the DNS server addresses. To connect to the CLI you require:
• Serial connection between the FortiGate unit and a management computer.
• A terminal emulation application on the management computer.
If you are configuring the FortiGate unit to operate in Transparent mode, you can
switch to Transparent mode from the web-based manager and then use the setup
wizard to add the administration password, the management IP address and gateway,
and the DNS server addresses.
Next steps
Now that your FortiGate unit is operating, you can proceed to configure it to connect to
networks:
• If you are going to operate the FortiGate unit in NAT/Route mode, go to
“NAT/Route mode installation” on page 27.
• If you are going to operate the FortiGate unit in Transparent mode, go to
“Transparent mode installation” on page 39.
• If you are going to operate two or more FortiGate units in HA mode, go to “High
availability installation” on page 47.


