11
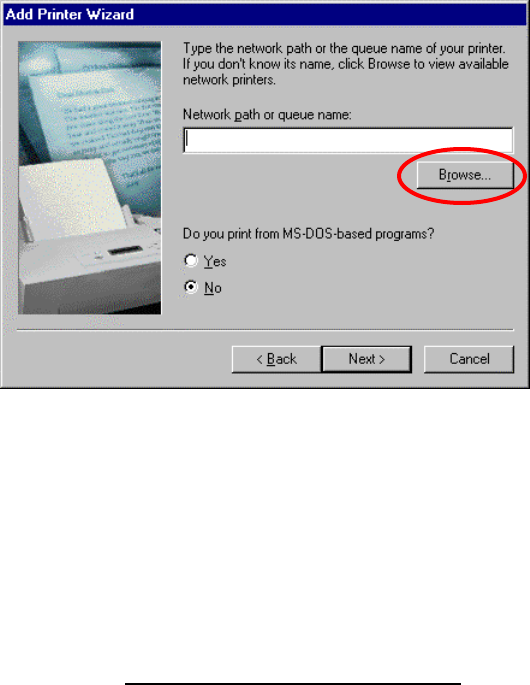
(4) Click the [Browse] button, find and select the printer that you wish to share, then click the
[Next] button.
(5) The applicable printer driver is enabled, finishing the shared printer setup.
You may need to install the applicable printer driver if it has not yet been installed.
(Refer to the manuals provided with the PC or OS for further details of the setup procedure)
4. Accessing networked computers
(All file transfers or other access between networked computers should be performed the same as for a normally
networked Windows computer. Refer to the manuals provided with the PC or contact your PC’s maker for details.)
Double-click the [Network Neighborhood] or [My Network Places] desktop icon.
The names of any PCs connected to the switch device are shown.
Double-clicking the icon of the PC that you wish to access should show you a list of all the shared
folders on the target PC.
Refer to the section on “Setting up drive and folder sharing” for details of how to setup a shared
folder.
* Sometimes timing issues may cause the PC that you wish to access to not be visible. Try
reopening the [Network Neighborhood], or select [Refresh] from the [View] menu.
5. Uninstalling the software (deleting the program)
Proceed as follows when uninstalling the USB Bridge Software:
Select [Start] -> [Settings] -> [Control Panel], then double-click the [Add/Remove Programs]
control panel icon.
On the [Install/Uninstall] tab, scroll down the list of installed software to find and select “USB-USB
Network Bridge V1.8.0.0”, then click the [Add/Remove] button.
You are asked to confirm that you wish to delete the “USB-USB Network Bridge V1.8.0.0”
software. Click the [OK] button.
If you do not wish to delete the USB Bridge software, just click the [Cancel] button.
The uninstaller starts up, and the program files are deleted.
After the uninstallation finishes, you are asked to reboot the PC. Click the [Yes] button.
This completes the removal of the USB Bridge driver and all related files. If you later decide to use
this software again, consult section 2 “Installing the software” and reinstall and setup the software
as before.


