CHAPTER 4: Installing Components
38
8 Connect any cables to the card. For more information, see the instructions in the card’s
documentation.
9 Follow the instructions in “Closing the server case” on page 24.
10 See the card’s documentation for software installation instructions.
Replacing the processor
The system board has a single AM2 CPU socket which supports one AMD® Opteron™ or Athlon™
processor with 3.0 GHz Hyper Transport Bus. The system connects with the nVIDIA MCP 55
through the Hyper Transport Bus. The server automatically detects the processor each time you
turn it on. Whenever you install a new processor, you should first install the most current version
of the BIOS. For instructions, see “Updating the BIOS” on page 48.
To replace a processor:
1 Install the most current BIOS version. For instructions, see “Updating the BIOS” on page 48.
2 Follow the instructions in “Preventing static electricity discharge” on page 18. Make sure
that you turn off the server, then unplug the power cord(s) and all other cables connected
to the server.
3 Follow the instructions in “Accessing the internal components” on page 19.
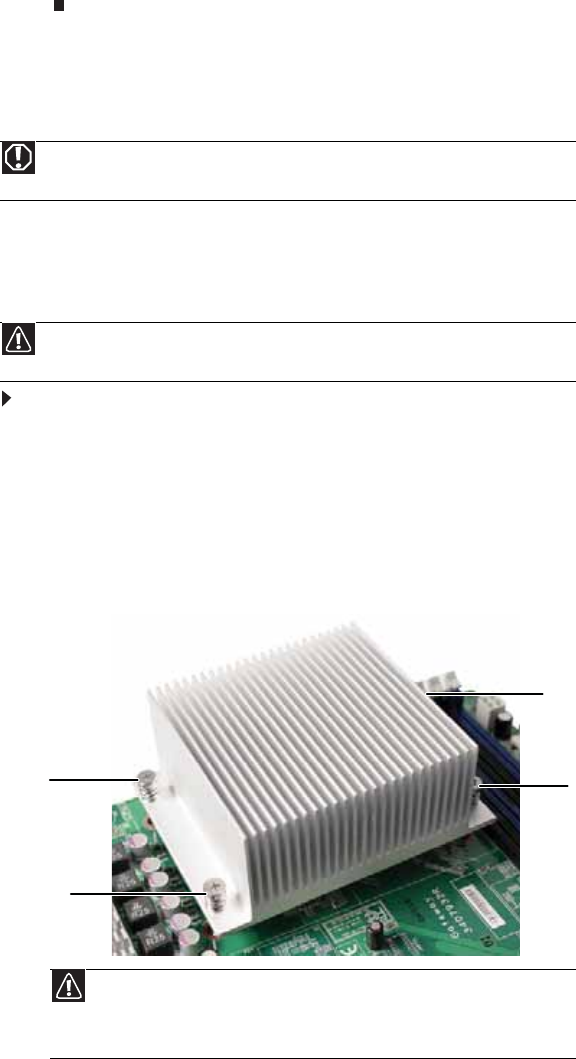
4 Loosen the four screws holding the heatsink to the processor, then lift the heatsink off
the processor.
Warning
The processors and heatsink may be hot if the computer has been running. Also,
there may be sharp edges on the heatsink. Consider wearing protective gloves.
Caution
A heatsink must be installed on the processor. Installing a processor without a
heatsink could damage the processor.
Caution
The heatsink has Thermal Interface Material (TIM) on the bottom. Be careful
not to damage this material when you remove the heat sink from the processor.
If removing the heatsink also pulls the processor out of the processor socket, the
processor could be damaged.
Screw
Screw
Screw
Screw
