www.gateway.com
49
Recovering the BIOS
If you encounter a problem while you are updating the BIOS, such as a power outage, the BIOS
update may not be successful. If the system continues to try to boot from the new, corrupted
BIOS, you can manually recover the old BIOS so you can try another update.
To create a recovery disk:
1 Download 646MS100.WPH (the system BIOS for your server) from the Gateway Support
Web page, then rename the file to BIOS.WPH.
2 Download CRISDISK.ZIP (a Crash Recovery Diskette utility) from the Gateway Support Web
page, then uncompress it to a folder.
3 Copy BIOS.WPH (the file you renamed) to the same folder.
4 Insert a blank, formatted floppy disk into your diskette drive.
5 Run CRISDISK.BAT to create the recovery disk.
To recover the BIOS:
1 Follow the instructions in “Preventing static electricity discharge” on page 18. Make sure
that you turn off the server, then unplug the power cord(s) and all other cables connected
to the server.
2 Follow the instructions in “Opening the server case” on page 19.
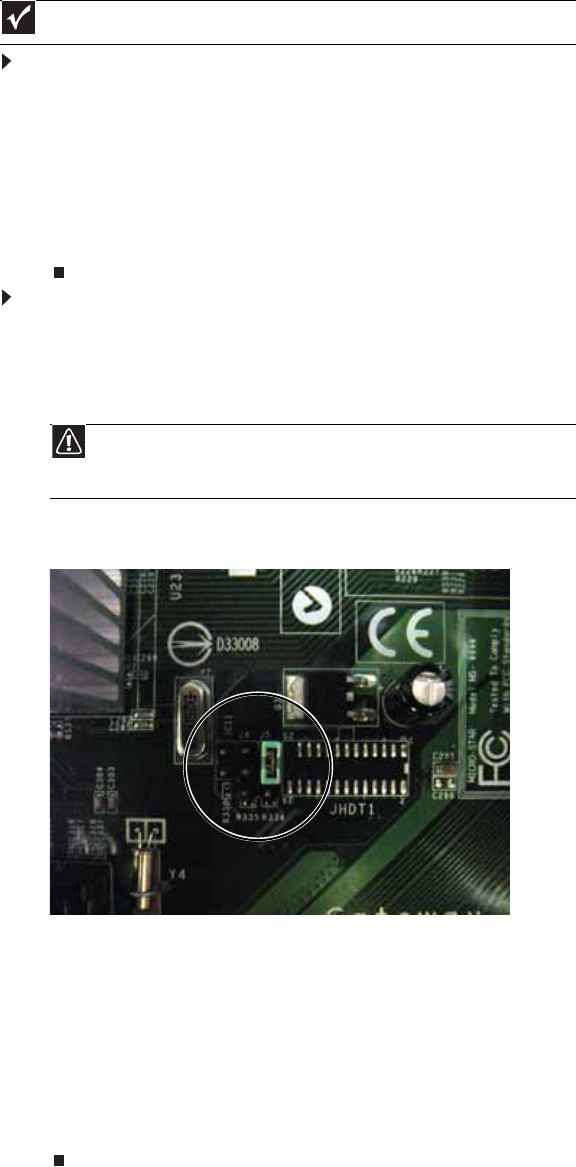
3 Remove the jumper across pins 1-2 of header J5 and place the jumper across pins 2-3 (as
shown in the illustration).
4 Follow the instructions in “Closing the server case” on page 24.
5 Insert the recovery disk into the diskette drive.
6 Turn on your server and wait until you hear “beep-beep-beep,” then turn off your server
again.
7 Follow the instructions in “Opening the server case” on page 19.
8 Place the jumper back onto pins 1-2.
9 Follow the instructions in “Closing the server case” on page 24.
10 Reboot the server and verify that the recovery was successful.
Important
This method does not work if the keyboard is connected through the KVM switch.
Caution
Moving the jumper while the power is on can damage your server. Always
turn off the server and unplug the power cords and all other cables before changing
the jumper.
