


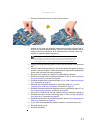

CHAPTER 3: Replacing notebook components
86
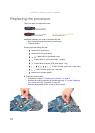
Replacing the system board
Tools you need to complete this task:
Screws removed during this task:
• 1 black M2×5 (hard drive)
• 1 black M2.5×6 (optical drive)
• 3 black M2.5×6 (keyboard cover)
• 2 black M2.5×6 (LCD panel hinge - bottom)
• 2 black M2.5×6+Nylok (LCD panel hinge - top)
• 10 M2.5×6 black (palm rest - base side)
• 3 M2.5×6 black (palm rest - top side)
• 1 black M2×4 (system board)
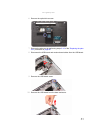
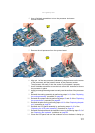
To replace the system board:
1 Complete the steps in “Preparing the notebook” on page 47.
2 Complete the steps in “Removing the battery” on page 48.
3 Remove the memory from the old system board and install it on the new
system board by following the instructions in the “Adding or replacing
memory modules” section on page 50.
4 If the notebook has a wireless card installed, remove the card from the old
system board and install it on the new system board by following the
instructions in the “Replacing the wireless card” section on page 52.
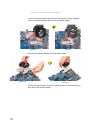
5 Remove the hard drive by performing steps 3 and 4 of the “Replacing the
hard drive” procedure on page 54.
6 Remove the optical drive by performing steps 3 and 4 of the “Replacing the
optical drive” procedure on page 56.
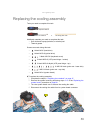
7 Remove the palm rest by following steps 6–18 of the “Replacing the palm
rest” procedure on page 68.
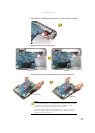
8 Remove the modem board by following steps 8–10 of the “Replacing the
modem board” procedure on page 77, then disconnect the Bluetooth module
cable from its system board connector.
Phillips #0 screwdriver
Flat screwdriver or Non-marring plastic scribe