


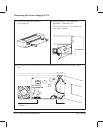

1 Remove the window D page 6Ć15.
2 Remove the center cover D page 6Ć16.
3 Remove the left endcover D page 6Ć18.
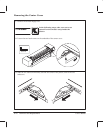
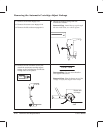
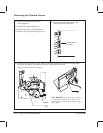
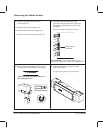
4 Detach the linkage spring from the
YĆtensioner bracket.
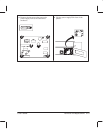
Reassembling: Attach the sprng through
the two small holes, as n the dagram.
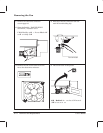
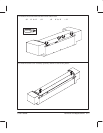
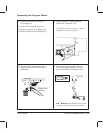
5 Remove the two shoulder screws that
attach the automatic cartridgeĆadjust
linkage to the left sideplate and lift the
linkage clear of the plotter.
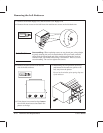
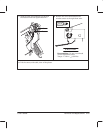
CAUTION
Reassembling: Do not crossĆthread or
overĆtighten the screws.
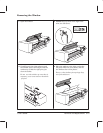
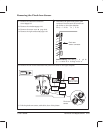
Reassembling: Rest the bottom arm of the
lnkage on top of the stepperĆmotor shaft.
Stepper-motor
shaft
Bottom arm
of linkage
Torx-15
6Ć20 Removal and Replacement
C3187Ć90000
Removing the Automatic CartridgeĆAdjust Linkage