3-37
Operating the Library
Using Online Drive Replacement
Library Operation
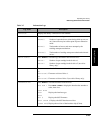
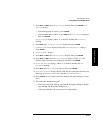
5. Press NEXT or PREV until DRIVE STATUS displays, then press ENTER. DRV 1
ON GOOD displays.
• If the damaged tape is in drive 1, press
ENTER.
• If the damaged tape is in drive 2, press
NEXT until DRV 2 ON GOOD displays,
then press
ENTER.
DRV # ON GOOD displays, where “#” is the drive number and ON GOOD is
flashing.
6. Press
NEXT until DRV # OFF FAILED displays then press ENTER.
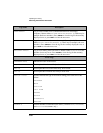
7. CHANGE CONFIRMED displays briefly, then ONLINE REPAIR * displays.
Press
ENTER.
8. DRIVE POWER * displays.
9. Press
NEXT or PREV until DRIVE STATUS displays, then press ENTER.
10. Press
NEXT or PREV until DRV # OFF FAILED displays (where “#” is the
number of the drive that was just taken off-line) then press
ENTER.
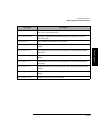
11. DRV # OFF FAILED displays, where “#” is the drive number and OFF
FAILED is flashing.
12. Press
NEXT until DRV # ON GOOD displays, then press ENTER.
13. SETTING UP DRIVE displays briefly while the drive communication tests run,
following by CHANGE CONFIRMED and then ONLINE REPAIR *.
14. Press
CANCEL twice to return to the drive numbers and status indicators (“ready”
state).
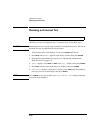
15. Try reading the damaged tape again.
• If the tape can be read, back up data from the damaged cartridge to another
tape cartridge and discard the damaged one.
• If the tape cannot be read, call your service representative.


