Display assembly on computers with 14.0-in displays
NOTE: For information about removing the display from 15.6-in models, see Display assembly on
computers with 15.6-in displays on page 78.
NOTE: The display assembly spare part kit includes two WLAN antenna transceivers and cables.
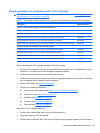
Description Spare part number
For use only with black computers with 14.0-in HD displays
AntiGlare display assembly for use in computers not equipped with a webcam
536784-001
AntiGlare display assembly for use in computers equipped with a webcam 536785-001
BrightView display assembly for use in computers not equipped with a webcam 536786-001
BrightView display assembly for use in computers equipped with a webcam 536787-001
BrightView display assembly for use in computers equipped with a webcam and WWAN module 578366-001
For use only with red computers with 14.0-in HD displays
AntiGlare display assembly for use in computers not equipped with a webcam 572932-001
AntiGlare display assembly for use in computers equipped with a webcam 572933-001
BrightView display assembly for use in computers not equipped with a webcam 572934-001
BrightView display assembly for use in computers equipped with a webcam 572935-001
Before removing the 14.0-in display assembly, follow these steps:
1. Shut down the computer. If you are unsure whether the computer is off or in Hibernation, turn the
computer on, and then shut it down through the operating system.
2. Disconnect all external devices connected to the computer.
3. Disconnect the power from the computer by first unplugging the power cord from the AC outlet and
then unplugging the AC adapter from the computer.
4. Remove the battery (see
Battery on page 60).
5. Remove the following components:
a. Switch cover and keyboard (see
Switch cover and keyboard on page 61)
b. Optical drive (see
Optical drive on page 66)
c. Speakers (see
Speakers on page 69)
d. Top cover (see
Top cover on page 84)
e. Palm rest (see
Palm rest on page 71)
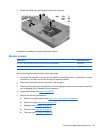
Remove the 14.0-in display assembly:
1. Position the computer right-side up with the front toward you.
2. Open the computer as far as possible.
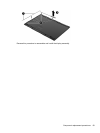
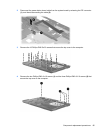
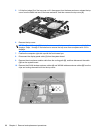
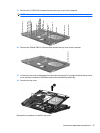
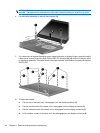
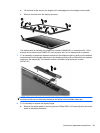
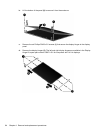
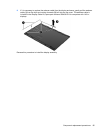
3. Remove the four Phillips PM2.5×4.5 screws (1) that secure the display assembly to the computer.
Component replacement procedures 91


