


USER GUIDE FOR HP 6 COLOR PLUGIN
AG50324 Rev. 7 8
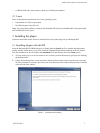
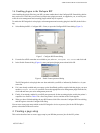
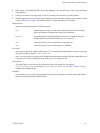
3. Enter information in the fields as follows:
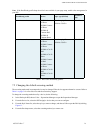
• Device: Select a device from the list. The device you select will largely depend on the dot type,
screening method and resolution you prefer to use. See Table 2 for details about which dot types are
supported and the screening modes that are available.
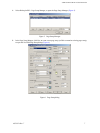
• ProofReady: Select a ProofReady profile to use for color managed output. Your choice of profile will
mainly depend on the paper type installed in your printer, but it may also be influenced by the output
resolution you want to use. See Table 3 for details of ProofReady profiles that are available and the
HP paper type and resolutions each has been optimized for.
• Resolution: This setting is automatically chosen by the ProofReady profile for this device. Unless
you have good reason to do so, do not change the resolution settings.
• Style: This setting is automatically chosen to suit the selected device. Do not change this setting.
• Color: This setting is automatically chosen to suit the selected profile. However, if you wish to use
your own color profile, choose it instead from the list. See, “Creating color setups” on page 27 for a
description of how to create your own color setups.
• Calibration: Set this to
(None). Calibration is pre-defined by the ProofReady profile. However, to
achieve even better results, you may wish to create your own calibration profile for the machine you
are outputting using the correct paper. To do this, see “Calibrating the printer” on page 24.
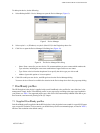
4. Click Configure Device to open the Configure Device dialog, which allows you to specify output options
for the selected device. For example, it allows you to specify the output method (file, network (including a
print server) or LPT1), media type, and output quality.
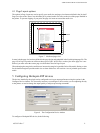
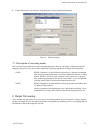
5. Click Page Layout and choose the paper size installed in the printer. If the job is an EPS file, or the job does
not contain page size information (most jobs do), set the page size too.
6. If it is necessary to do so, you can adjust the positioning of the output on the media by adjusting the page
margin values. See, “Page Layout options” on page 8 for details.
7. Click Save As and choose an appropriate name for your new page setup.
8. Click OK to close the Page Setup Manager.
The page setup has now been created and may be used to process jobs. Remember to create page setups for each
type of paper that you use in your printer, choosing the device type and ProofReady profile to match.