


HP Color Copier User’s Guide 5-5
.
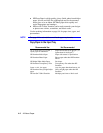
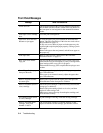
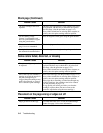
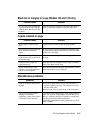
Remove and check color
cartrid
g
e. Verif
y
Part
Number: C1823A
The wron
g
tri-color cartrid
g
e is installed. Remove it, and
re
p
lace it with the correct cartrid
g
e,
p
art number C1823A.
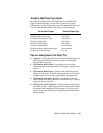
Unlock scanner. The scanner is locked.
Turn off the HP Color Co
p
ier. The scanner lock is located
beneath the front
p
anel on the ri
g
ht side. Unlock the scanner
b
y
twistin
g
the
g
reen knob under the front
p
anel toward the
back of
y
our HP Color Co
p
ier, until it sto
p
s. (The lever onl
y
turns one wa
y
.)
Cartrid
g
e carria
g
e blocked. Unblock the carria
g
e, and turn
p
ower off then on a
g
ain.
Scanner bulb failin
g
. The scanner bulb is becomin
g
too dim to work
p
ro
p
erl
y
.
Turn
p
ower off, then on a
g
ain. If the messa
g
e continues and
the li
g
ht flickers or does not come on,
y
our HP Color Co
p
ier
needs to be serviced. See
p
a
g
e 8-4 for more information.
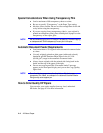
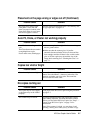
Turn Power off then on
a
g
ain.
A s
y
stem error has occurred that
y
ou cannot resolve
y
ourself.
Turn
p
ower off, then on a
g
ain. If this messa
g
e a
pp
ears
re
p
eatedl
y
, or remains on the dis
p
la
y
, call HP Customer
Su
pp
ort for hel
p
(see
p
a
g
e 6-2).
Additional cleanin
g
will be
ineffective. Re
p
lace
cartrid
g
e.
Re
p
lace the
p
rint cartrid
g
e.
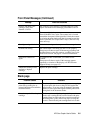
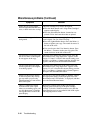
Blank pa
g
e
Possible Causes Solutions
The ori
g
inal was
p
laced
p
rint-side u
p
on the
g
lass or
p
rinted side facin
g
forward in the
document feeder.
Turn the ori
g
inal over. Be sure the
p
a
g
e
y
ou are co
py
in
g
is
p
laced
p
rint-side down on the
g
lass and a
g
ainst the
g
reen borders. If
y
ou are usin
g
an automatic document
feeder, be sure to
p
lace the ori
g
inal with the
p
rinted side
facin
g
back in the document feeder.
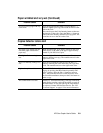
Protective ta
p
e is still on the
p
rint
cartrid
g
e.
Each new
p
rint cartrid
g
e is
p
acka
g
ed with
p
rotective
p
lastic ta
p
e coverin
g
the ink nozzles. Remove the
p
rint
cartrid
g
e from its cradle and, bein
g
careful to touch onl
y
the black
p
lastic,
g
entl
y
remove an
y
ta
p
e coverin
g
the
nozzles. Then insert the
p
rint cartrid
g
e back in its cradle.
Front Panel Messa
g
es (Continued)
Messa
g
e What You Should Do