


Alea Systems, Inc. Rev.1.13 Pingo-Photo Rep
User manual
16
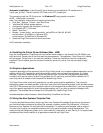
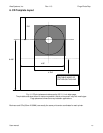
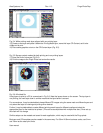
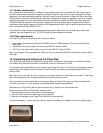
Fig. 5-2 Properly placed concentric circles with rectangle mask
7) Create a square larger than the diameter of the larger circle and place it so that there is about a half inch of
space on all sides between the circle and square (Fig. 5-2). The square should not extend more than 5.60 inches
below the top of the page.
8) Select both the outer circle and the new square/rectangle objects.
9) Using the appropriate object combination tool, combine the two objects so the common area is removed
allowing anything in the background or on layers below the current one to show through.
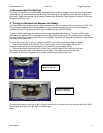
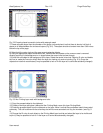
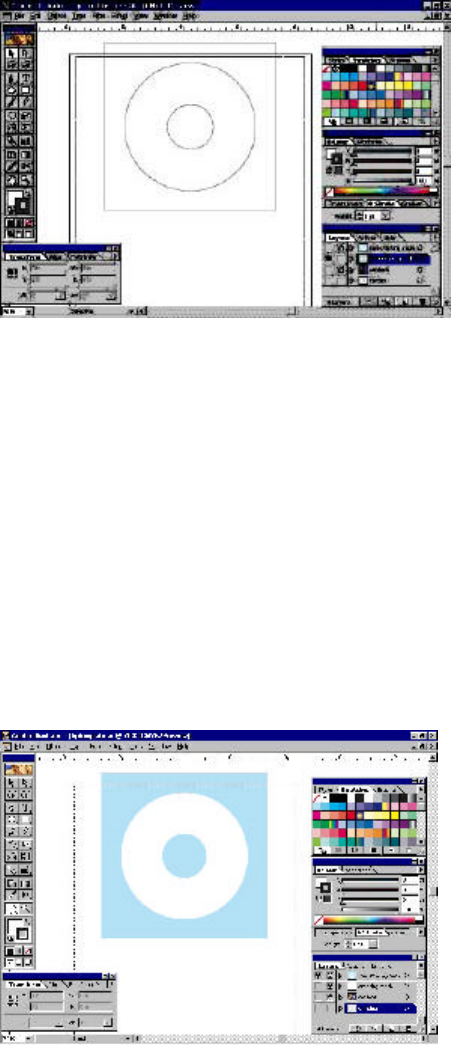
10) Send the new object to the background of its layer. Select the center hole circle. Select a fill color and delete
the line (or make the line color white). Mark the layer for viewing only and not printing (Fig. 5-3). Group the
objects and note their coordinates (it may be possible to lock or fix the layer so it cannot be accidently changed).
Fig. 5-3 Non Printing layer mask with background color
11) Copy the grouped object to the clipboard
12) Create a new layer and place it below the Non Printing Mask; name this layer Printing Mask.
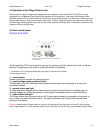
13) Paste the grouped object from the clipboard on the layer. Move it so that the coordinates match those noted
previously. This can be done with the arrow keys but will be more accurate to do it by the numbers. (see Fig. 5-
4)
14) Change the fill color of each object on the Printing Mask layer to white and select the layer to be visible and
to print (it may be possible to lock or fix the layer so it cannot be accidentally changed).