


38
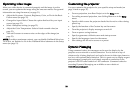
Using Network Functions
IMPORTANT: To enable network functions at all times (even when the
projector is powered off), the Network item in the Always-On Functions
submenu in the Setup menu must be set to Yes (not No).
Projector network fu
nctions include:
• Configuring and controlling the
projector via a web browser.
• Failure and warning alerts via email.
• Projector Management via SNMP.
• Controlling the projector via Scheduling.
NOTE: Pro
jector web pages and emails sent by the projector are always
displayed in English language.
For network control, you can access the projector through Port 23 (Telnet).
We use the same control codes on serial as we do over the network. InFocus
network control uses the Telnet packet structure.
Before using the network functions
To use the network functions of the projector, the project
or must be
configured to suit your network. Consult with your network administrator
before connecting the projector to your network; incorrect network
configuration of the projector may cause problems on your network.
Connect the Network Cable
Properly connect projector to the network,
then configure the following
settings.
If Using a Network with DHCP Enabled:
3 Use the projector's remote control or keypad to select the Network item
in the projector's Setup menu.
4 If DHCP is off, select it to turn it on.
If Using a Network that Does Not have DHCP Enabled:
1 Use the projector's remote control or keypad to select the Network item
in the projector's Setup menu.
2 If DHCP is on, select it to turn it off.
NOTE:
If you still do not see an IP address, go to the projector’s Setup menu,
select Network, then turn on Show Network Messages. After exiting the
menu, press the Source button again.
3 Select IP Address. This will highlight the first of the four octets in the IP
address. Press Up or Down to change the value, then press Select or Right
when done to move to the next octet. Repeat until you have changed all
four octets in the IP address.
4 Repeat the above for Subnet Mask, Default Gateway, and other settings
that are in IP address format (to assign or change the Host Name, see
Network Settings Page below).
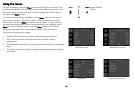
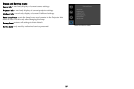
Configuring and Controlling the Projector via a Web Browser
You can adjust or control the projector via a network from a web browser on
a computer that is connected to the same network as the projector.
NOTES:
• To access the projector's web pages, the projector must be connected to
the netw
ork and connected to AC power (and if you want to access the
network even when the projector is powered off, make sure the
Network item in the Always-On Functions submenu in the Setup menu
is set to Yes).
• JavaScript must be enabled in your browser to use the projector web
pages pro
perly. If JavaScript is disabled, see the Help files for your web
browser for details on how to enable it.
• If no operations are performed in the web browser for approximately
ten minutes, the system will automatically log you off.
Logging in
To log into the projector web pages, follow these steps:
1 Make sure the projector is connected to the network and connected to
AC power.