


39
2
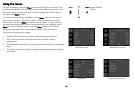
If you don't know the projector's IP
address, turn on the projector. After the
projector starts up, if its IP address is not
shown, press the Source button to view the IP address.
3 Start a web browser on your computer.
4 Enter the projector's IP address or host name (preceded by http://) into
the web browser's address bar. Example: If the IP address is
192.168.1.10, enter http://192.168.1.10 into the browser's address bar.
5 The Log In to Projector Control page will be shown in the browser.
6 Select Access type: Basic User or Administrator.
7 Click Log In.
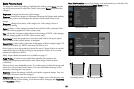
Navigating Projector Web Pages
The left side of every page shows a navigation bar. Click the links in the
navigation bar to go to different projector web pages.
NOTE: If a
Basic User is logged in, no links are shown.
The top of the navigation bar shows the
projector name, model, and serial
number.
The web pages also include the following options:
• Log Off: Logs off and returns to the Log In page (see above).
• Ref
resh: Reloads the page with current status.
• Defaults: Displays default (factory settings) values (to save these values
click Apply).
• Apply: S
aves the values that are currently shown on the page.
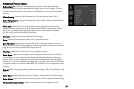
Projector Controls Page (All users)
This page lets you control the same settings that are available via the
projector's main menu and remote control. The Controls tab includes basic
remote control functions; other tabs correspond to the projector's menus.
NOTE: If a Basic User is logged in, only the Controls, Basic Picture, and
Advanced Picture tabs are shown.
In each tab, the current value of each s
etting is shown in blue color.
NOTE:
Unlike other pages, changes you make to Projector Control settings
are applied immediately.
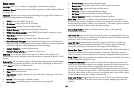
• To change an on/off setting (e.g
. Power): Click the corresponding On or
Off button.
• To change a multi-value setting (e.g. Sharpness): Se
lect a value from the
drop-down menu.
• To change a numeric setting (e.g. Brightness): Click the corresponding +
or - button, or select a value from the drop-down menu.
• To perform a command (e.g. Auto Image): Click the corresponding
Execute button.
Network Settings Page (administrators only)
This page lets you view and change the projector's network settings.
Consult with your network administrator before making any changes on
this page; incorrect network configuration of the projector may cause
problems on your network.
Projector Name: The name of the projector shown in the projector's web
pages.
IP Address: These sett
ings control the projector's network configuration.
Enter the appropriate settings required for your specific network.
Advanced Network Settings:
Click this link to show advanced settings:
802.1x Authentication: If
your network requires 802.1x authentication, enter
the user name and password that the projector should use, and select the
authentication type.
SNMP: I
f your network uses SNMP, enter necessary SNMP information
here.