36
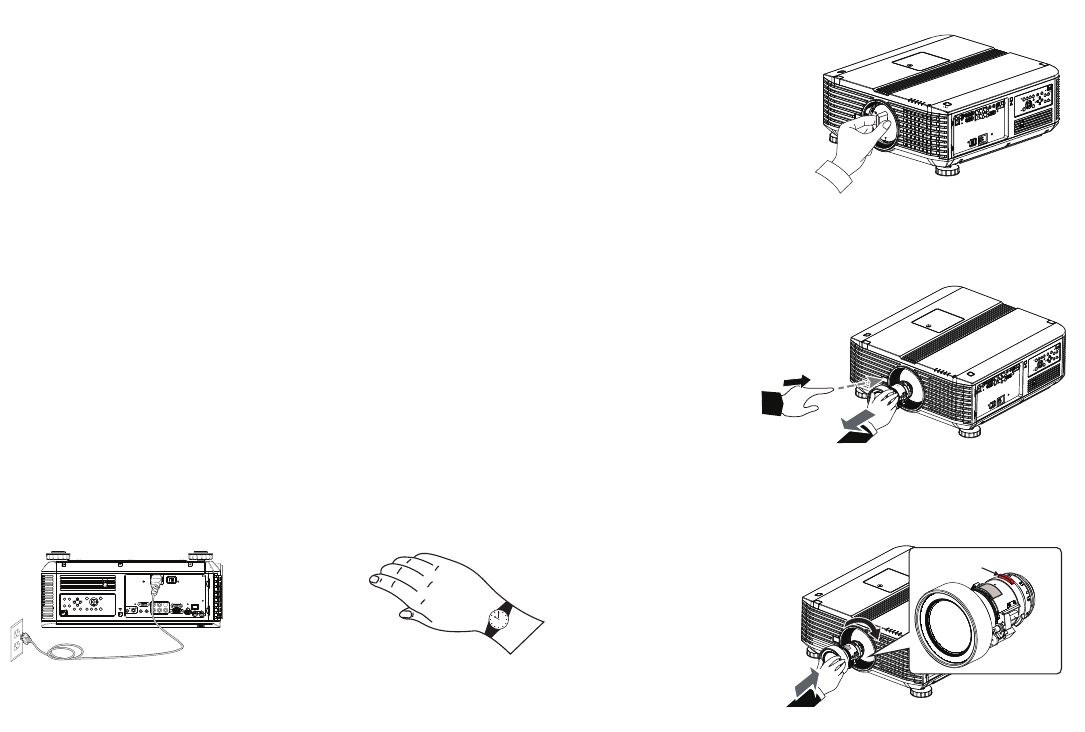
Replacing the lens
This projector is shipped without a lens. You can order a lens from
www.infocus.com (in select areas), your retailer or your dealer.
1 Turn the projector off and unplug the power cord.
2 Wait 60 minutes to allow the projector to cool thoroughly.
3 If a lens is not attached, remove the dust cap from the projector and go to Step
6.
4 If a lens is attached, press and hold the release button located near the lens
(marked “Press: Release lens”) to release the lock.
5 Twist the lens counter-clockwise and carefully remove it from the front of the
projector. Release the release button.
6 Insert the new lens into the projector carefully, arrow side up, through the
front of the projector. Turn the lens clockwise until you hear a click.
7 Plug in the power cord, turn on the power switch and press the Power button
to turn the projector back on. Note: Connection to a circuit with a minimum of
20A capacity is recommended.
8 Activate the Center Lens feature in the Alignment menu. (This will allow the
lens to work properly.)
§
(3)
(4)
(5)
(6)
Turn off and
unplug projector
Wait 60
minutes
(1) (2)


