


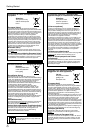
14
Connection and Installation
Please read the following carefully when installing this unit.
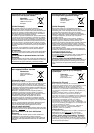
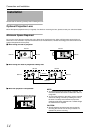
Optional Projection Lens
Mount the optional projection lens (A Page 60). For details on mounting the lens, please consult your authorized dealer.
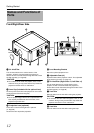
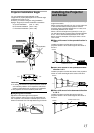
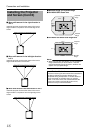
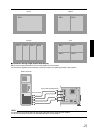
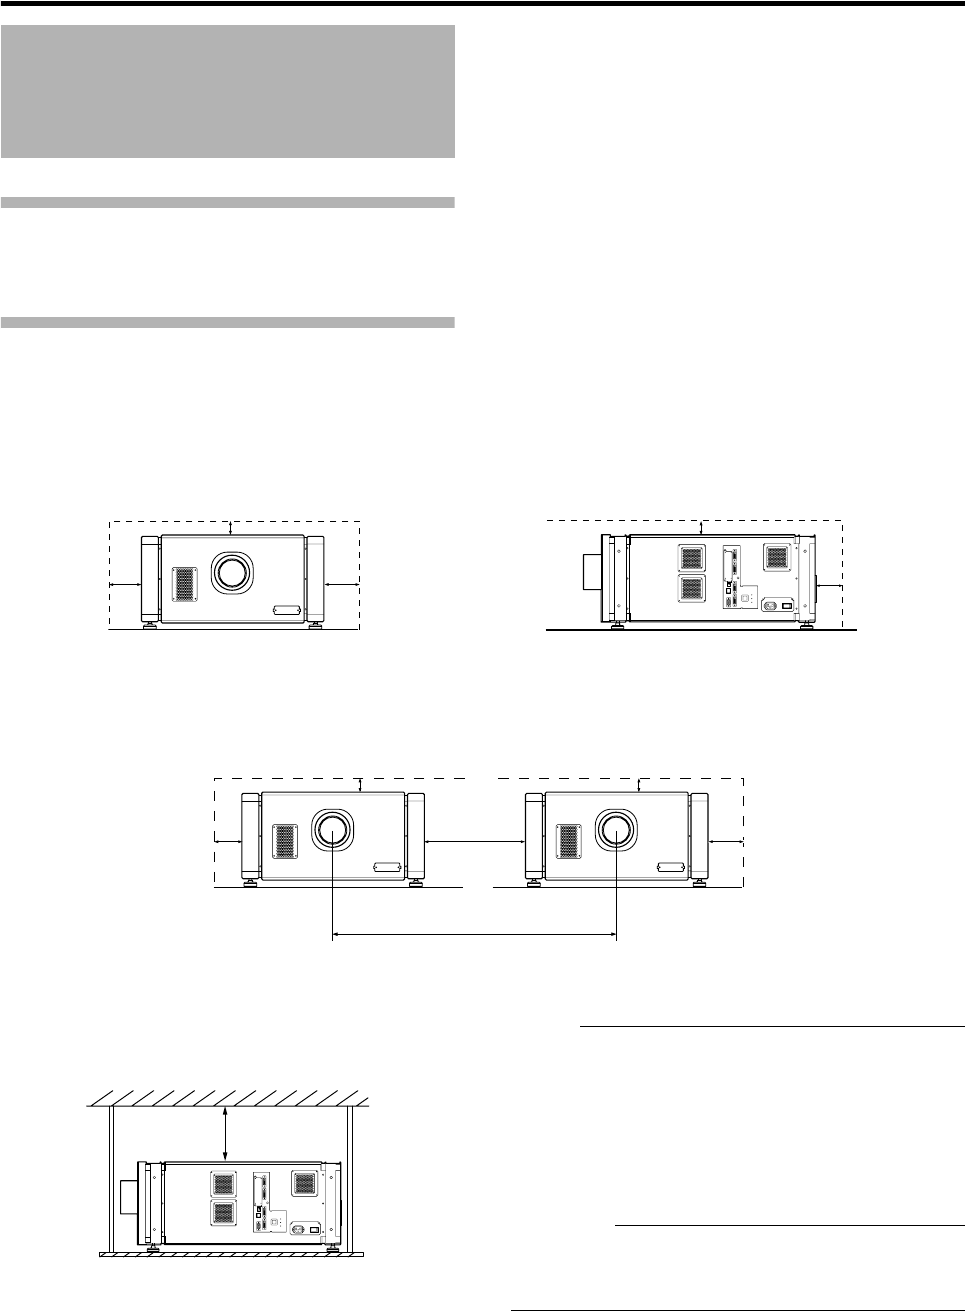
Minimum Space Required
Do not use a cover that may enclose this unit or block the air inlets/vent holes. Allow sufficient space around this unit.
When this unit is enclosed in a space with dimensions as indicated below, ventilate accordingly so that the internal and
external temperatures are the same.
Ⅵ When using one set of projector
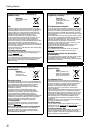
Ⅵ When using two sets of projectors side by side
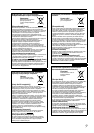
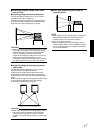
Ⅵ When the projector is suspended
NOTE:
● To prevent the projector from falling or toppling, it is
recommended that the holder be fastened to the unit
using bolts.
● To mount the projector to the ceiling, mount a special
shelf to the ceiling, followed by installing the unit on
the shelf. For safety and maintenance purposes,
equipment that eases adjustment to a suitable height
for maintenance is required.
CAUTION:
● Special expertise and techniques are required for
mounting this unit. Be sure to ask your dealer or a
specialist to perform mounting.
Installation
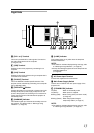
OPERATE I/B
DVI 3
USB
LAN
RS-232C
STANDBY/ON
CONTROL
LAMP
WARNING
DVI 4
DVI 1
DVI 2
300 mm
600 mm600 mm
300 mm
600 mm
300 mm
1,300 mm
600 mm
300 mm
600 mm
640 mm
OPERATE I/B
DVI 3
USB
LAN
RS-232C
STANDBY/ON
CONTROL
LAMP
WARNING
DVI 4
DVI 1
DVI 2
600 mm and
above