


15
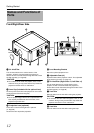
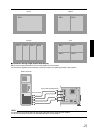
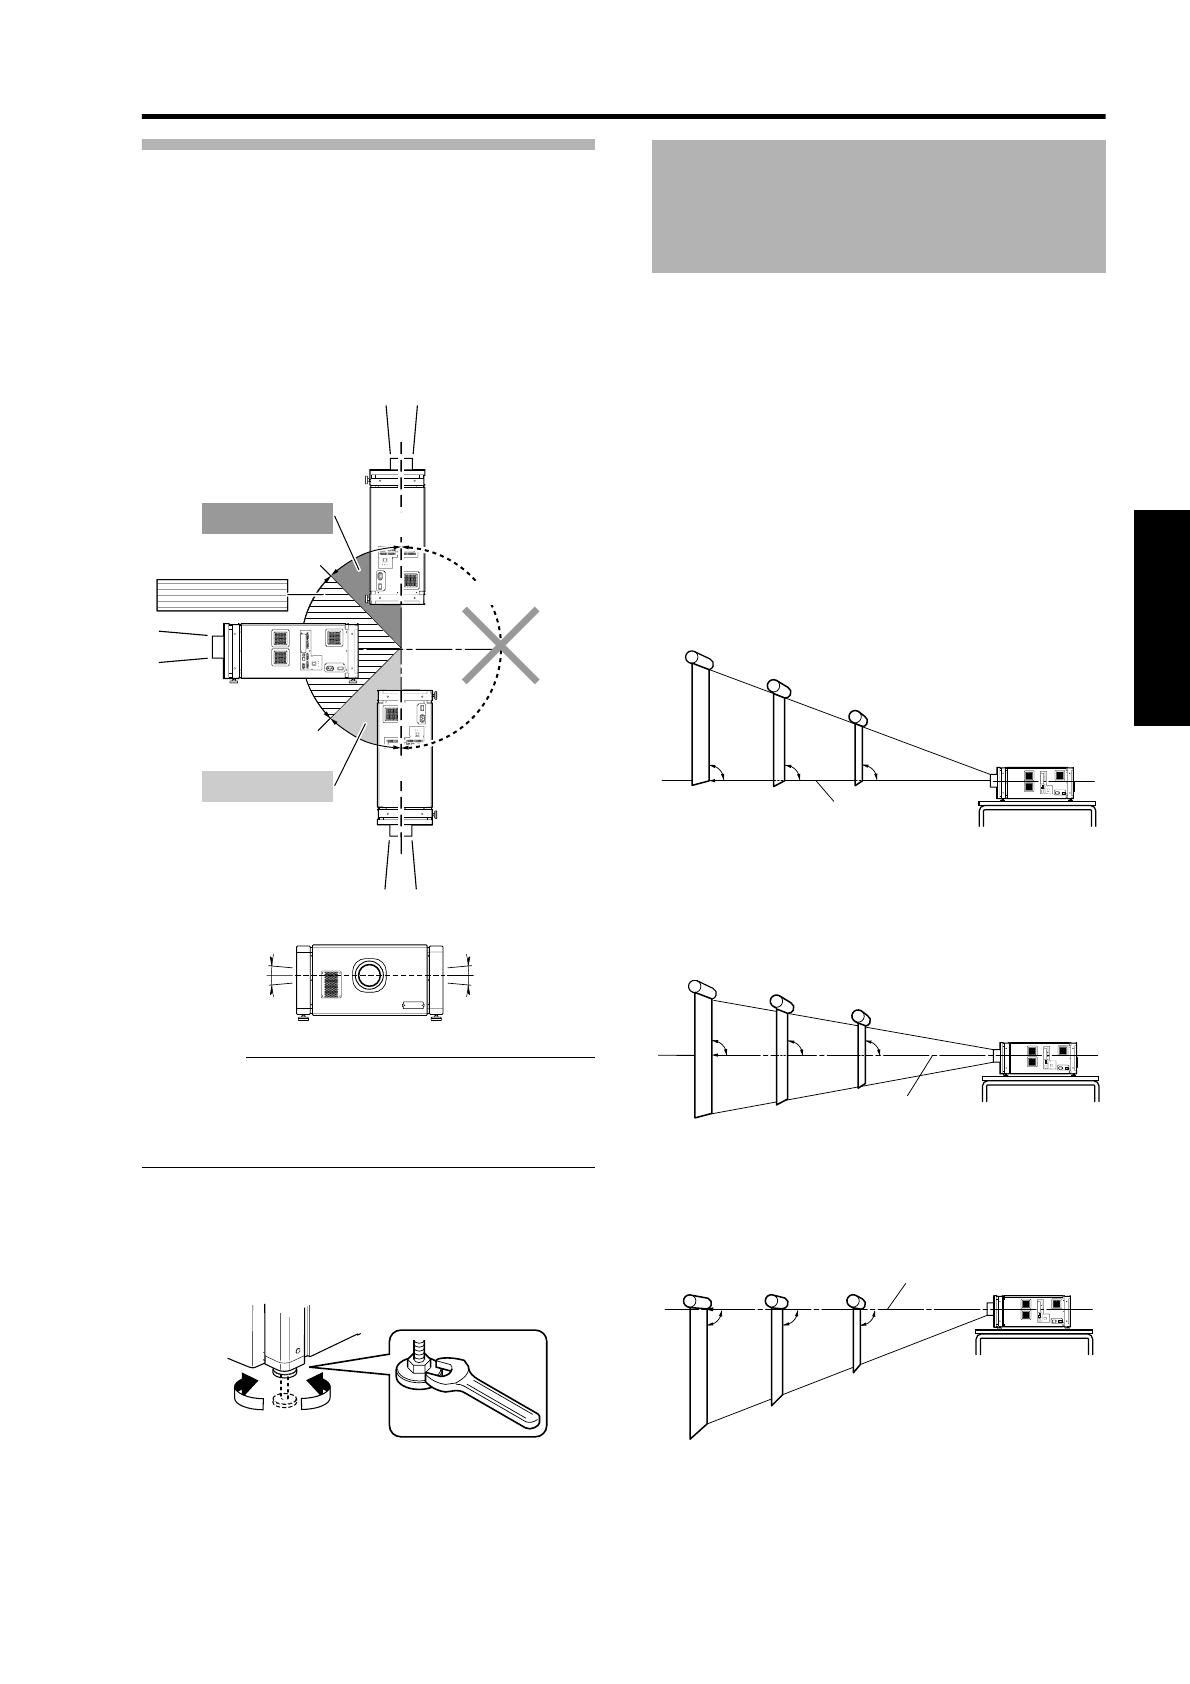
Projector Installation Angle
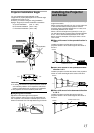
You can install this projector between ؓ90؇.
Images will be properly displayed if the horizontal angle
is between the range of ؓ5؇.
However, you have to configure using [Installation
Style](A Page 48) for certain installation orientations.
A: Upward installation (+45؇ to +90؇)
B: Horizontal installation (-45؇ to +45؇)
C: Downward installation (-45؇ to -90؇)
CAUTION:
● To ceiling-mount this unit, special expertise and skills
are necessary. Make to sure request the authorized
dealer or specialized work contractors for installation.
● The projector cannot be installed upside down.
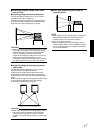
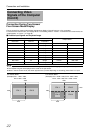
Ⅵ Adjusting the Inclination
Adjust the horizontal angle of the projector.
Lift the projector and turn the nut of the adjustable foot
with a spanner in the direction indicated by the arrow to
extend or retract the foot. The adjustable range is 20 mm.
It is recommended that this projector be installed at right
angle to the screen.
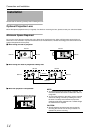
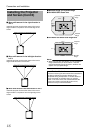
When a zoom lens (optional) is in use, you can make use
of the lens shift feature of this projector to shift the
projection screen vertically between 0% to ؓ50%, and
horizontally between 0% to ؓ25%.
When a short focal length lens (optional) is in use, you
can shift the projection screen position vertically between
0% to ؓ15%, and horizontally between 0% to ؓ5%.
Below are some examples on the layout when a zoom
lens is used.
Ⅵ When shift amount in the upward direction is
+50 %
Install the projector such that the lower end of the
projection screen is at the same height as the center of
the lens.
Ⅵ When shift amount in the upward/downward
direction is 0 %
Install the projector such that the center of the projection
screen is at the same height as the center of the lens.
Ⅵ When shift amount in the downward direction
is -50 %
Install the projector such that the upper end of the
projection screen is at the same height as the center of
the lens.
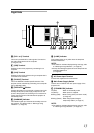
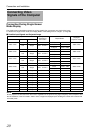
OPERATE I/B
DVI 3
USB
LAN
RS-232C
STANDBY/ON
CONTROL
LAMP
WARNING
DVI 4
DVI 1
DVI 2
OPERA
TE I/
B
DV
I 3
USB
LAN
RS-232C
STANDBY/ON
CONTR
OL
LAMP
WA
RN
ING
DV
I 4
DV
I 1
DV
I 2
OPERA
TE I/
B
DV
I 3
USB
LAN
RS-232C
STANDBY/ON
CONTR
OL
LAMP
WA
RNING
DV
I 4
DV
I 1
DV
I 2
C: -45؇ to -90؇
ؓ5؇ؓ5؇
A: +45؇ to +90؇
B: -45؇ to +45؇
T Not applicable
+45؇
-45؇
+90؇
-90؇
Extend Retract
Installing the Projector
and Screen
Screen
Center Line of Lens
90؇ 90؇ 90؇
Screen
90؇ 90؇ 90؇
Center Line of Lens
Screen
90؇ 90؇ 90؇
Center Line of Lens