


20
Quick Setup
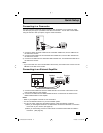
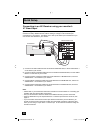
By connecting your AV Receiver to your monitor's V1 Smart Input, you can watch picture
sources from many different devices, without having to change or use the other input
connections on your monitor. This allows you to free up the other input connections so you
can connect more devices to your monitor.
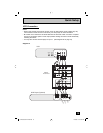
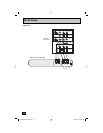
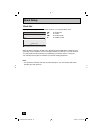
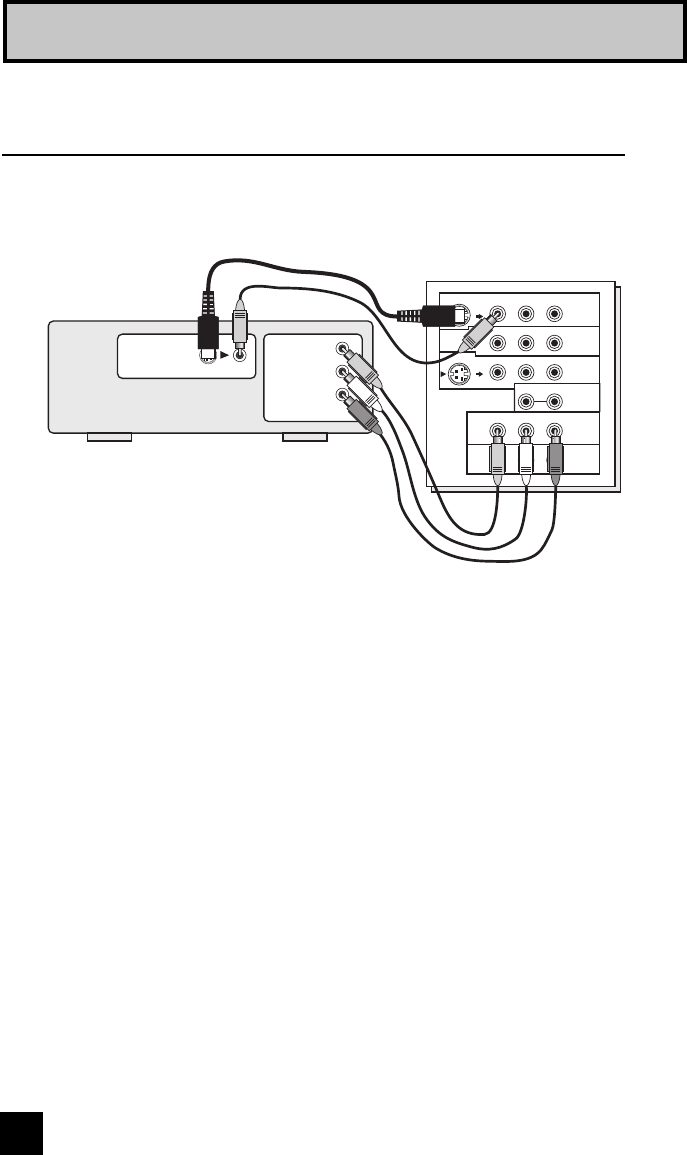
Connecting to an AV Receiver using your monitor's
V1 Smart Input
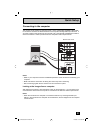
Monitor Rear Panel
OVER
INPUT-1
INPUT-2
INPUT-3
HDMI 1
INPUT-1
INPUT-2
VIDEO
VIDEO
VIDEO
R - AUDIO - L
R - AUDIO - L
R - AUDIO - L
R - AUDIO - L
Y Pb Pr
Y Pb Pr
S-VIDEO
S-VIDEO
OVER
MONITOR
OUT
MONITOR OUT
Y
P
B
P
R
AV Receiver
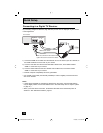
1) Connect an S-Video Cable from the AV Receiver's MONITOR OUT, to the S-Video INPUT-1
on the back of your monitor.
2) Connect a Yellow Composite Cable from the AV Receiver's MONITOR OUT, into the VIDEO
INPUT-1 on the back of your monitor.
3) Connect a Green Component Cable from the AV Receiver's Y MONITOR OUT, into the Y
VIDEO INPUT-1 on the back of your monitor.
4) Connect a Blue Component Cable from the AV Receiver's PB MONITOR OUT, into the Pb
VIDEO INPUT-1 on the back of your monitor.
5) Connect a Red Component Cable from the AV Receiver's P
R MONITOR OUT, into the Pr
VIDEO INPUT-1 on the back of your monitor.
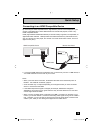
Note:
• Please refer to your AV Receiver instruction manual for more information on connecting your
speakers and other devices like a DVD player.
• Use your AV Receiver's remote to switch to the different devices you have connected.
• Some AV Receivers may not respond when the V1 Smart Input function is turned on, see
page 41.
• If you have video connections for each input device connected to your AV Receiver, you
should not connect them using both S-Video and Composite connection at the same time
when you are using V1 Input as the V1 Smart Input. In this case we recommend using the
S-Video connection.
LCT2065-001B-A ENG.indd 20LCT2065-001B-A ENG.indd 20 12/18/06 10:10:55 AM12/18/06 10:10:55 AM