


38
6
q
6
q
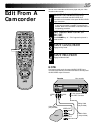
EDITING (cont.)
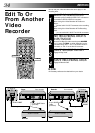
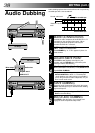
Audio dubbing replaces the normal audio sound of a previously
recorded tape with a new soundtrack.
Audio Dubbing
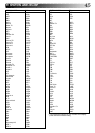
Original sound
AUDIO OUT
Mixer output
Audio mixer
CD Player
CD Player
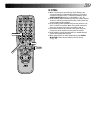
PAUSE
AUDIO DUBBING
PLAY
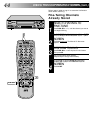
MAKE CONNECTIONS
1
Connect an audio component to the AUDIO IN L + R
connectors on the recorder's front panel. *When
connecting monaural equipment, use only the
recorder's AUDIO IN L connector.
SET INPUT MODE
2
Press NUMBER key "0". "F-AU" appears in place of a
preset number.
LOCATE START POINT
3
Press PLAY to start playback of the tape in your
recorder, and press PAUSE when you find the point
where you want to start dubbing.
ENGAGE AUDIO DUBBING
4
Press AUDIO DUBBING.
● To perform audio dubbbing with audio mixing, press
AUDIO MONITOR to select "L + R" at this point.
*Audio dubbing with audio mixing is not possible if
you're using a monaural audio component, or if you
don't have an audio mixer.
START DUBBING
5
Engage the audio component's Play mode, then press
PLAY to start the tape in your recorder. Audio dubbing
begins at this point.
● To stop dubbing temporarily, press PAUSE. Press
PLAY to resume dubbing.
END AUDIO DUBBING
6
Press STOP to stop the tape in your recorder, and
engage the audio component's Stop mode.
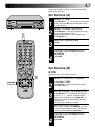
Pre-recorded tape
Audio-dubbed tape
Normal audio track
Video/Hi-Fi audio
track