


A-61195 July 2003 11
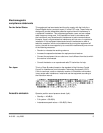
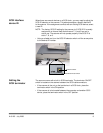
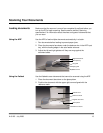
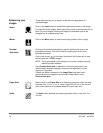
Output tray 1. Hold the output tray at about a 30° angle.
2. Insert the three tabs on the output tray into the three slots on the ADF.
3. Release the output tray.
4. Make sure that the output tray is firmly attached to the ADF.
5. Pull the output tray extension wire out to the desired length.
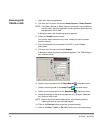
Powering up
the scanner
Make sure that you press the I/O power switch on the back of the scanner and
not the SCSI terminator switch (which has an ON/OFF label under it) when you
want to turn the scanner on or off. The scanner must be on and its self-test
completed before you power up the PC.
IMPORTANT: Before you power up the scanner, make sure that there are no
documents in the ADF or on the flatbed platen.
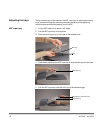
Turning on the scanner • Press the side of the power switch that is marked “I” to turn on the scanner.
The power light on the ADF illuminates. If it does not, check the
power source.
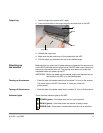
Turning off the scanner • Press the side of the power switch that is marked “O” to turn off the scanner.
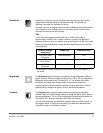
Indicator lights There are three indicator lights on the ADF.
Output tray
Slots
Tabs
ADF
POWER (green)—illuminates after you turn on the scanner.
READY (green)—illuminates when the scanner is ready to scan.
ERROR (red)—illuminates or flashes when there is an error condition.