


Making Basic Copies
89
2 Specify the desired copy settings.
" For details on specifying the copy quality, refer to “Specifying the
Copy Quality” on page 89.
For details on specifying the zoom ratio, refer to “Specifying the
Zoom Ratio” on page 89.
For details on selecting the copy density, refer to “Selecting the
Copy Density” on page 91.
For details on selecting the media tray, refer to “Selecting the
Media Tray” on page 91.
For details on setting 2in1 copying, refer to “Setting 2in1 Copying”
on page 92.
For details on ID card copying, refer to “ID Card Copying” on page
93.
For details on setting duplex (Double-Sided) copying, refer to “Set-
ting Duplex (Double-Sided) Copying” on page 95.
For details on setting collated copying, refer to “Setting Collated
Copying” on page 97.
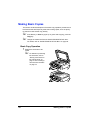
3 Using the keypad, specify the desired number of copies.
" If the number of copies was incorrectly entered, press the Cancel/
C key, and then specify the correct number of copies.
4 To print color copies, press the Start-Color key. To print monochrome
copies, press the Start-B&W key.
Copying begins.
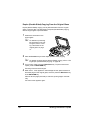
" If the Stop/Reset key is pressed while copying, PRESS THE
START KEY TO RESUME
appears. To continue copying, press
the Start-B&W key or the Start-Color key. To stop copying, press
the Stop/Reset key.
Specifying the Copy Quality
The copy quality can be set according to the contents of the document.
1 Press the Quality key.
2 Press the * or ) key to select MIX, TEXT or PHOTO, and then press the
Menu/Select key.
The main screen appears again.
Specifying the Zoom Ratio
The zoom ratio can be specified either by selecting a preset zoom ratio or by
specifying a custom zoom ratio.