


4. Settings Required for Network Printing
25
Settings made on the Printer Driver side
• Windows 2000 and XP:
1. Click the “Start” button and, from the menu that will then appear, select
“Settings” – “Printers.” Start the printer addition wizard and select “Network
printer.”
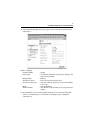
2. Select the “Locate Your Printer” tab and then select “Connect to a printer on the
Internet or on your intrernet.”
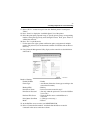
3. Type http://“IP address”/ipp in the “URL” field.
4. Insert the printer driver CD-ROM in the CD-ROM drive.
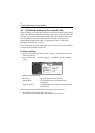
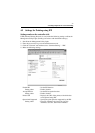
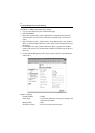
5. On the screen for selecting the manufacturer and model of your printer, click the
“Have Disk..” button.
6. Click the “Browse..” button and specify where the printer driver is from the CD-
ROM.
NOTE
For Windows XP users, use the printer driver for Windows 2000.
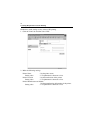
7. Make sure that “Konica IP-711_8031/9331 PCL5c” or “Konica IP-711_8020/
9231 PCL5c” appears in the printer list. Then, click “Next>.”
8. Change the default printer setting and printer name as necessary. Then, carry
out the test print.