


Repair information 4-23
5056-XXX
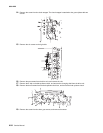
Main drive unit removal
1. Open the top unit, and remove the gear cover, upper cassette, left front cover, paper feed cover, RIP cover,
RIP board, RIP box, electronic box, and rear cover.
2. Open the turn guide and paper feed cover, and remove the duplex unit.
3. Remove the left side cover, power unit 1, and power unit 2.
4. Remove the printer controller board.
5. Remove the bracket, HVPS board, and sub frame R.
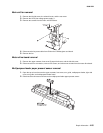
6. Remove the fuser unit, face up paper delivery unit, belt up/down clutch, and DC drive motor.
7. Remove the multipurpose feeder roll, registration roll, and paper carrying frame.
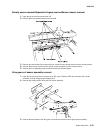
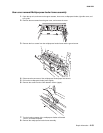
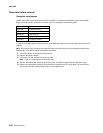
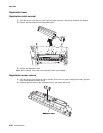
8. Remove the eight screws from the power supply 2 bracket.
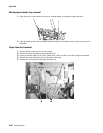
9. Remove the two screws from the belt power supply 2.
10. Remove the two screws from the fan bracket.
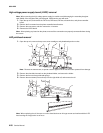
11. Remove the three screws from the fuser connector plate.
12. Remove the two screws of the fuser connector cable assembly from the fuser connector plate.
Note: Note the direction, when installing.
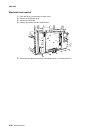
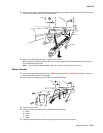
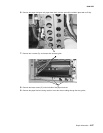
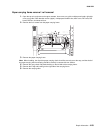
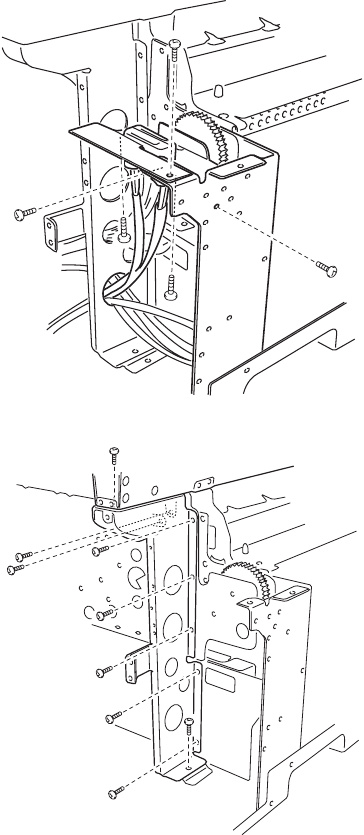
13. After removing the two screws on the bracket that attaches the rear side and paper exit side of the
machine, remove the nine screws from the bracket.