


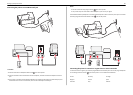

Launching the Wireless Setup Utility
1 Do the following:
In Windows 8
From the Search charm, type wireless setup utility, and then navigate to:
Apps list > Wireless Setup Utility
In Windows 7 or earlier
a Click or Start.
b Click All Programs or Programs.
c Select the printer program folder from the list, and then select Wireless Setup Utility.
2 Follow the instructions on the computer screen.
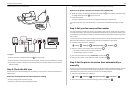
Using the Wireless Setup Assistant (Macintosh only)
The Wireless Setup Assistant lets you:
• Configure the printer to join an existing wireless network.
• Add a printer to an existing ad hoc network.
• Change the wireless settings after installation.
• Install the printer on additional network computers.
Notes:
• This application is applicable only in select printer models.
• Make sure the printer is turned on.
• Make sure the wireless network adapter installed in your printer is attached and working properly.
• Do not connect the installation or network cables until prompted to do so by the setup software.
• Make sure that you are using the latest version of the Wireless Setup Assistant application. For
more information, visit
www.lexmark.com.
Installing the Wireless Setup Assistant (Macintosh only)
1 Download the latest version of the Wireless Setup Assistant application from
http://support.lexmark.com.
2 Double‑click the downloaded software installer package.
3 Follow the instructions on the computer screen.
Launching the Wireless Setup Assistant
1 From the Finder, navigate to:
Applications > select your printer folder
2 Double‑click Wireless Setup Assistant, and then follow the instructions on the computer screen.
Note: If you encounter problems while running the application, then click
?
.
What is Wi‑Fi Protected Setup?
Wi
‑
Fi Protected Setup (WPS) is a simple and secure configuration that allows you to establish a wireless
home network and enable network security without requiring prior knowledge of Wi‑Fi technology. It is
no longer necessary to configure the network name (SSID) and WEP key or WPA passphrase for network
devices.
Note: WPS supports only networks that communicate through access points (wireless routers).
The printer supports the following methods in connecting to a wireless network:
• Personal Identification Number (PIN)—A PIN on the printer is entered into the wireless settings of the
access point.
• Push Button Configuration (PBC)—Buttons on both the printer and the access point are pushed within
a given period of time.
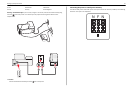
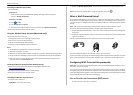
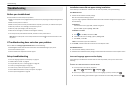
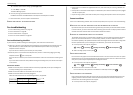
Look for any of these identifier marks to check if your access point is WPS certified:
You can find these WPS logos on the side, back, or top of your access point.
For more information on accessing the wireless settings and determining the WPS capability of your access
point, see the documentation that came with the access point or contact your system support person.
Configuring Wi‑Fi Protected Setup manually
Note: Make sure your access point (wireless router) is Wi‑Fi Protected Setup (WPS) certified. For more
information, see the User’s Guide.
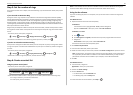
If your printer or device has not yet been configured for wireless connection and you want to configure
it using WPS, then push the WPS button on the wireless router. Wait for the printer control panel to display
a message to begin WPS configuration. There might be a short delay before the message appears. If nothing
happens after 30 seconds, then do one of the following:
USE THE PUSH BUTTON CONFIGURATION (PBC) METHOD
1 From the printer control panel, navigate to:
Wireless networking 43