


22
Setting Up: Advanced
Linksys E1550
5.
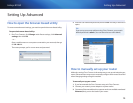
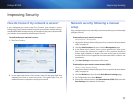
To prevent local network users from disabling your Internet connection
through UPnP, select Disabled (default) next to Allow Users to Disable
Internet Access. Otherwise, select Enabled.
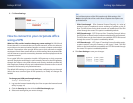
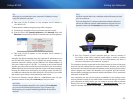
How to use a router as an access point
How can I use my old router as an access point? If you have a large area to
cover with your wireless signal, or if part of your home has weak signals due to
interference, you can use your old router to extend the range of your wireless
network. This is a complex process, so this procedure assumes that you have
some networking knowledge.
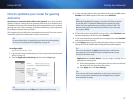
TIP
Check the documentation for your old router. Some brands of
routers include either a switch on the outside of the case or a
software option to convert it to an access point. If either of these
options is available, follow your old router’s instructions to convert
it to an access point.
You need to take note of your new router’s settings, then apply some of those
settings to the old router so it can work as an access point.
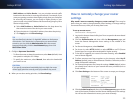
To view your new router’s settings:
Wireless > Basic Wireless Settings
Wireless > Wireless Security
Status > Wireless Network
Setup > Basic Setup
1.
Make sure that your new router is connected to the Internet.
2.
In the browser-based utility, click the Wireless tab, then click the Basic
Wireless Settings page and take note of the Network Name (SSID).
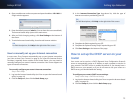
3.
Click the Wireless tab, then click the Wireless Security page and take
note of the Security Mode and the passphrase.
4.
Click the Status tab, then click the Wireless Network page and take note
of the Channel.
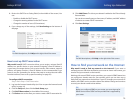
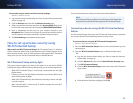
5.
Click the Setup tab, then click the Basic Setup page and take note of
the DHCP server’s IP Address range (192.168.1.100 to 192.168.1.149 by
default)
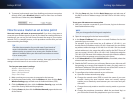
To use your old router as an access point:
1.
With your computer connected to your old router, log into its browser-
based administration utility.
NOTE
Save your changes after finishing each step below.
2.
Open the setup page for the local network (LAN).
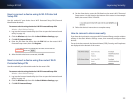
3.
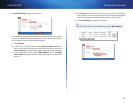
In the Router IP address field, enter an unused IP address for the LAN
network of your new router.
For example, if your new router has an IP address of 192.168.1.1, you
should choose an IP address on the 192.168.1.0 network. You can choose
any address within the range of 192.168.1.2 to 192.168.1.254. You should
exclude addresses in the range that will be used by the DHCP Server of
your new router (192.168.1.100 to 192.168.1.149). A safe choice might be
192.168.1.250. Take note of this address, because this will be the address
that you will use to manage your old router in the future.
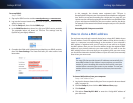
4.
In the Subnet Mask field, enter 255.255.255.0 or, if available, select that
subnet mask from a drop-down list.
5.
Disable the DHCP server on your old router. (Because your old router will
be operating as an access point instead of a router, you don’t want it to
distribute IP addresses. There should be only one active DHCP server on
your network, and that should be your new router.)
6.
To reconfigure the wireless network on your old router:
a.
Open the wireless network setup page.
b.
Change the network name (SSID) to match the name of your new
network. Having the same network name and security settings
enables you to seamlessly roam between your new router and your
old router.
c.
Change the security mode to match the security mode on your new
router.
d.
Change the passphrase (sometimes called the pre-shared key) on
your old router to match the passphrase on your new router.