


CFB 08/31/2010 Page 38
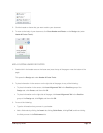
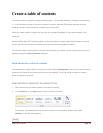
To change the overall look of your table of contents, click a different format in the Formats list.
You can see what your choice looks like in the Print Preview and Web Preview areas.
To change the type of line that appears between the entry text and the page number, click an
option in the Tab leader list.
To change the way heading levels are displayed in the table of contents, click Modify. In the
Style dialog box, click the level that you want to change, and then click Modify. In the Modify
Style dialog box, you can change the font, the size, and the amount of indentation.
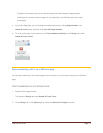
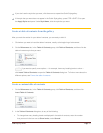
3. To use custom styles in the table of contents, click Options, and then do the following:
1. Under Available styles, find the style that you applied to the headings in your document.
2. Under TOC level, next to the style name, type a number from 1 to 9 to indicate the level that
you want the heading style to represent.
NOTE If you want to use only custom styles, delete the TOC level numbers for the built-in
styles, such as Heading 1.
3. Repeat step 1 and step 2 for each heading style that you want to include in the table of
contents.
4. Click OK.
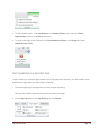
4. Choose a table of contents to fit the document type:
Printed document If you are creating a document that readers will read on a printed page,
create a table of contents in which each entry lists both the heading and the page number where
the heading appears. Readers can turn to the page that they want.
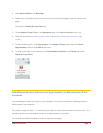
Online document For a document that readers will read online in Word, you can format the
entries in the table of contents as hyperlinks, so that readers can go to a heading by clicking its
entry in the table of contents.
Update the table of contents
If you added or removed headings or other table of contents entries in your document, you can quickly update
the table of contents.