


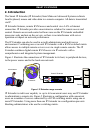


SMART IP EXTENDER
13
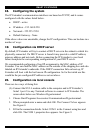
18. Configuring the system
The IP Extender's communication interfaces are based on TCP/IP, and it comes
configured with the values listed below.
• DHCP - active
• IP address - 192.168.0.220
• Net mask - 255.255.255.0
• Default Gateway - None
If the above values are unsuitable, change the IP configuration. This can be done in a
number of ways:
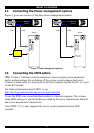
19. Configuration via DHCP server
By default, IP Extender will try to contact a DHCP server in the subnet to which it is
physically connected. If a DHCP server is found it may provide a valid IP address,
gateway address and net mask. Before connecting the IP Extender to your local
subnet complete the corresponding configuration of your DHCP server.
We recommended configuring a fixed IP assignment to the MAC address of IP
Extender. You can find the MAC address on the outside of the shipping box and also
labeled on IP Extender's underside. If the DHCP connection fails on boot up, IP
Extender will boot with the last known IP configuration. So for the initial use this
would be the pre-configured IP address as set out above.
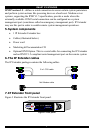
20. Configuration via local console
There are two ways of doing this:
(A) Connect the NULL modem cable to the computer and to IP Extender’s
Serial 1 port. Use any Terminal software to connect to IP Extender. The
screen shots below use Windows Hyperterminal.
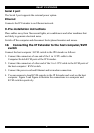
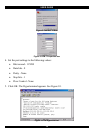
1. Choose Start/Programs/Accessories/Communications/Hyperterminal.
2. When prompted enter a name and click OK. The Connect To box appears.
See Figure 8.
3. Fill in the connection details. Select COM 1 in the Connect using box and
click OK. The COM 1 properties box appears. See Figure 9.