3-2 NPort Server Lite User’s Manual
Preparing Windows NT/95/98 for a TCP/IP Network
In order use a PC via an Ethernet network to control serial devices connected to NPort
Server Lite, you must first have a host running Windows NT/95/98. This type of
application also requires the host to have an Ethernet card and TCP/IP protocol installed. If
your computer does not already have an Ethernet card installed, you will need to purchase
one, and then follow the instructions provided by the Ethernet card manufacturer to install
and set up the card.
. Note: We recommend installing a PCI Ethernet card on your NT/95/98 host. Because of
the BUS difference, a PCI bus Ethernet card will perform much better than an ISA
Ethernet card. The PCI card reduces system loading under high speed and multiple
port usage.
IP Address Configuration
You may choose from three different methods to configure NPort Server Lite’s IP address.
The first method, using the server’s LCD Panel, simply requires plugging the server into an
electrical outlet.
LCD Panel
The LCD buttons on NPort Server Lite’s top panel are manipulated in a manner similar to
the way a modern cellular phone is operated. (See Appendix B for a complete description
of how to use the LCD buttons.) As you move through the various functions and setting
options, note that the top line shows the current menu or submenu name, and the bottom
line shows the submenu name or menu item which is activated by pressing SEL.
We would like to set the IP address. To do this you should:
1. Plug in the power cord (if necessary, see the section Connecting the Hardware from
Chapter 2 for complete instructions), and then press MENU once, after which you
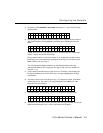
should see the MAIN MENU screen:
M
A
I
N
M
E
N
U
S E
R
V
E
R
S
E T
T
I
N
G
↓
2. Press s twice, at which point the LCD screen displays:
M A
I
N
M
E
N
U
↑
N E
T
W
O
R
K
S
E
T
T
I
N
G
↓


