Chapter 6: FaxFinder Client Software Operation
Multi-Tech Systems, Inc. FF200 FaxFinder Fax Server Admin User Guide 78
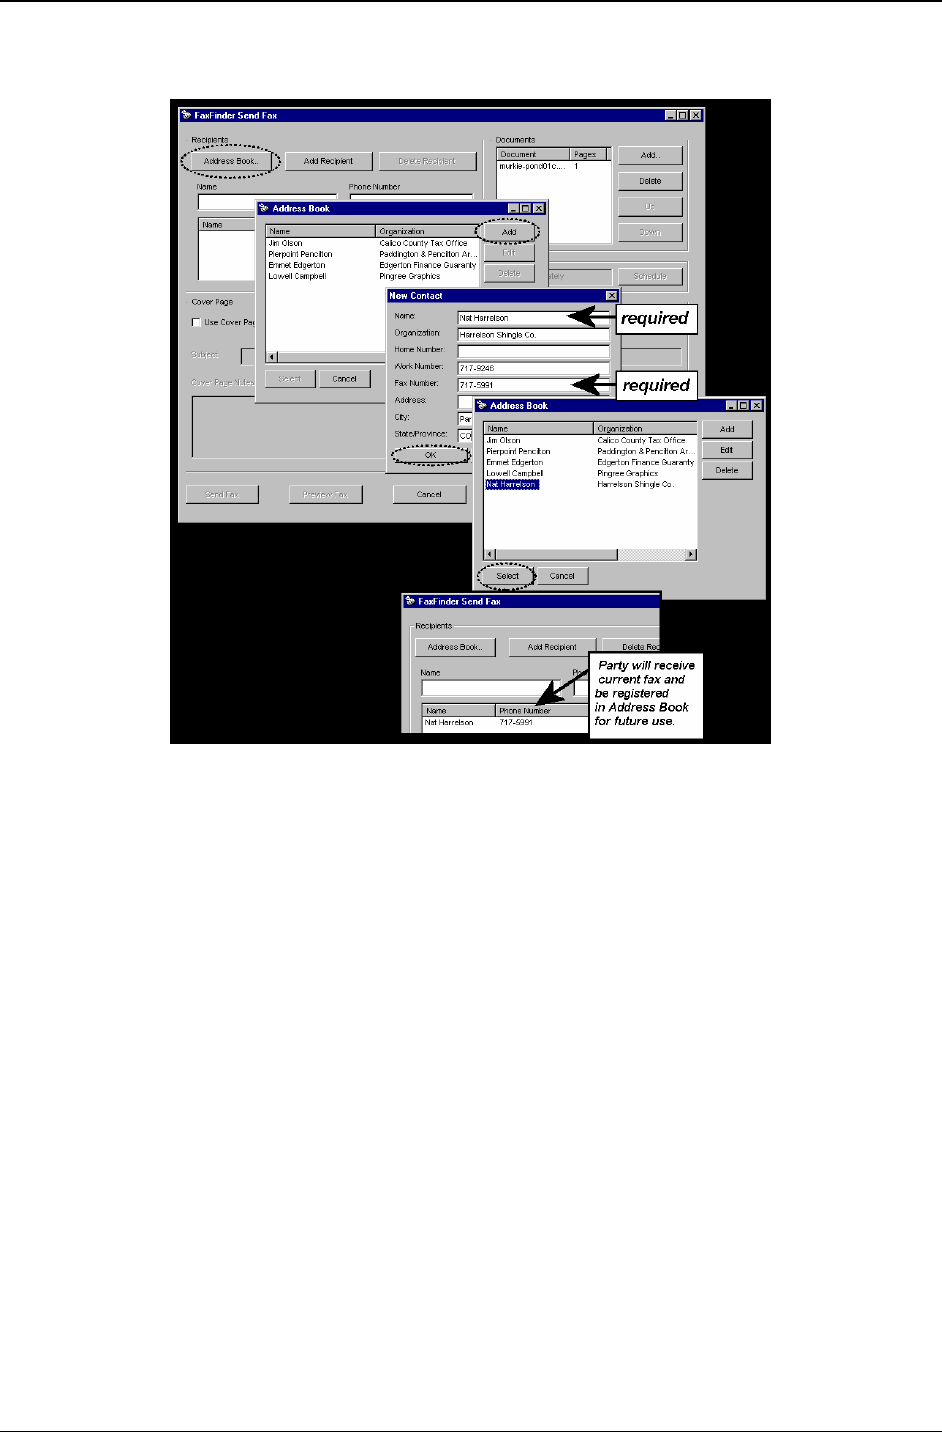
6. After the printing has been initiated by the application program, the FaxFinder Send Fax screen will
appear.
Click on Address Book. When the Address Book screen appears, click “Add.” At the New
Contact screen, enter the recipient’s name, fax number, and any other contact information you want
to retain.
The recipient’s fax number should be entered as you would dial it from a phone on the public phone
network (as from a residential phone). Click OK. At the Address Book screen, highlight the
recipient in the list and click “Select.” The party will appear in the “Recipients” list in the FaxFinder
Send Fax screen.
Additional recipients can be added. The same fax message will be sent to all recipients.
A recipient can also be specified directly in the FaxFinder SendFax screen by typing his/her name in
the “Name” field, typing his/her fax number in the “Phone Number” field, and then clicking on “Add
Recipient.” If the recipient is specified in this way, the user will be prompted about entering the
recipient in the Address Book but such recipients will not be added to the Address Book
automatically.
You can also access the Address Book directly to add and edit entries. At the FaxFinder Fax Client
Software screen, go to Edit | Add Contact.
7. If you want to include a cover page with your fax, click in the “Use Cover Page” checkbox. Enter
information as needed in the “Subject” and “Cover Page Notes” fields.
Automated fields, like sender information (individual name, company name, street address, phone
number, fax number, etc.) should be entered in the Address Book. The Address Book is accessible
in the “Options” menu of the FaxFinder Fax Client Software screen. For more information about
addresses and the automated fields used in cover pages, see the section “Setting Up Your Address
Book” later in this chapter.


