


Chapter 5 – RouteFinder Manager
RouteFinder RF500S User Guide 72
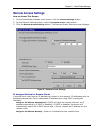
Remote Authentication Settings
How to Access This Screen
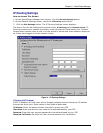
1. On the RouteFinder Manager main screen, click the
General Settings button.
2. On the General Settings screen, check the
IP Routing radio button.
3. Click the
PPP Settings button. The IP Routing Settings screen displays.
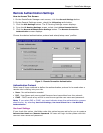
4. From the
IP Routing Settings screen, select check Allow Remote Dial-In.
5. Click the
Remote Authentication Settings button. The Remote Connection
Authentication screen displays.
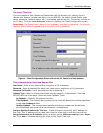
Choose the desired authentication protocol and select/setup users’ profiles.
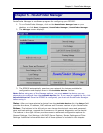
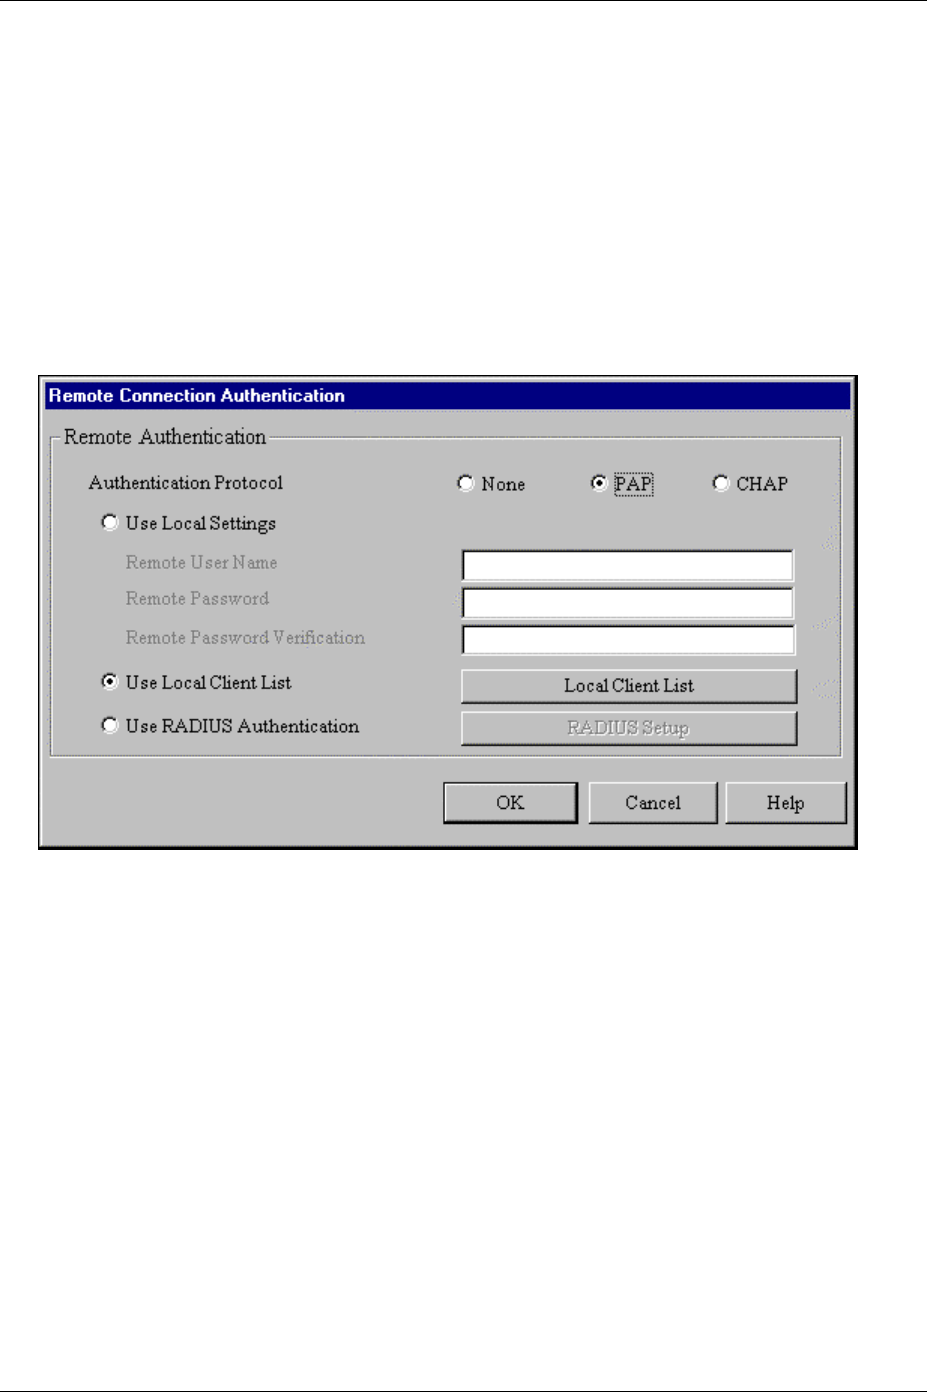
Figure 3 – Remote Connection Authentication
Authentication Protocol
Select one of three methods to define the authentication protocol to be used when a
remote site is dialing into your site:
•
None - No authentication needed.
•
PAP - User Name and unencrypted Password are transmitted over the network.
•
CHAP - DHCP sends a key which is used to encrypt the user name and password.
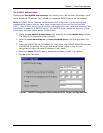
Note: If you select PAP or CHAP, you must indicate where the authentication process
should occur, by selecting Use Local Settings, Use Local Client List or Use RADIUS
Authentication
.
Use Local Settings
If you check this option, the fields under this option become active for you to create a
Remote User Name and Remote Password. All users will login to the system with this
common user name and password.