Installing NetWare
7-10 Installing Netware
3. When prompted to “Insert disk MAIN SERVER LICENSE,” insert your
red-labeled user authorization disk into Drive A, and press Enter.
4. NetWare attempts to mount the CD-ROM as a volume. This process may
take longer than the allotted 20 seconds and fail. Follow the on-screen
procedures and go to the system console screen (or press Alt + Esc).
Within several seconds, the CD-ROM mounts correctly and file copying
begins. This copying may last up to 15 minutes or longer, depending on
the speed of your CPU and SCSI channel.
5. The installation and configuration of your drive partitions and volumes is
AUTOMATIC under the “simple” installation. The process partitions
ALL the remaining disk space as the NetWare volume, SYS.
6. If an existing NetWare partition exists, you are asked whether to “Delete
existing non-bootable disk partitions?.” Enter Y for Yes and press Enter
to continue.
7. A “File copy...” percentage bar displays on the screen.
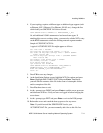
8. You are prompted to “Please wait....” while several files are copied to the
hard disk. Upon completion, an information screen displays your
Directory tree name, Directory context, and Administrator name. Write
this information down for safe-keeping. Press Enter to continue.
9. A “File Copy Status (Main Copy)” screen and percentage completed
graphic bar displays.
10. When the “Other Installation Actions” screen displays, select Continue
installation and press Enter.
Completing the Installation
1. At the “Complete” screen, press Enter to exit to the system console
screen and the “:” prompt.
2. At the “:” prompt, type LOAD INSTALL and press Enter.
3. At the “Installation Options” screen, highlight NCF files options and press
Enter. Highlight Edit AUTOEXEC.NCF and press Enter. The 4.1 install
defaults your frame type to Ethernet_802.2.


