


4-22 CRU Replacement and Server Upgrades
5. If you are replacing DIMMs, perform Installing DIMMs earlier in this
chapter, otherwise continue with the next step.
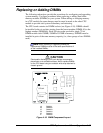
6. Install a DIMM cover in the now empty socket. See Installing DIMMs
earlier in this chapter.
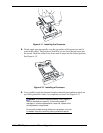
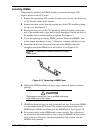
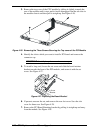
7. Install the CPU module top cover removed in Step 2, securing it with three
screws.
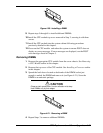
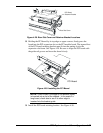
8. Install the CPU module into the system cabinet following procedures
previously detailed in this chapter.
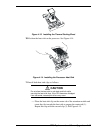
9. Power on the CPU module and reboot the system to ensure POST does not
display any error messages. If error messages are displayed, see the POST
error messages listed in Chapter 5.
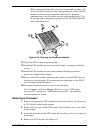
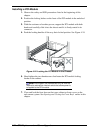
Replacing a PCI Module
Your system contains two redundant PCI modules that are accessible from the
front of the server unit.
The following subsections provide the procedures for removing and installing
PCI modules.
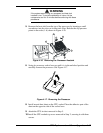
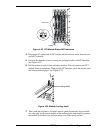
Removing a PCI Module
1. Observe the safety and ESD precautions listed at the beginning of this
chapter.
2. Unlock and open the front door on the tower cabinet or front covers on the
rack-mount system. See Opening and Closing the Front Bezel earlier in this
chapter.
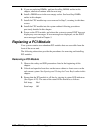
3. Ensure that the PCI module is off-line by viewing its status LED indicators
(See Figure 4-22). The state of the status LEDs should be as follows:
Fail lamp: Red
State lamp: Off