


11
CHAPTER 2
GETTING STARTED
OVERVIEW
This chapter tells you how to safely set up your printer and
begin printing right away. Included are instructions for:
• Selecting a location and unpacking
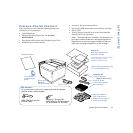
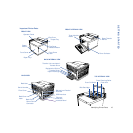
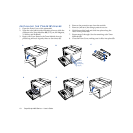
• Checking printer contents and identifying printer parts
• Installing the Belt Cartridge, Fuser Oil Bottle and Fuser
Cleaning Roller, and Toner Modules
• Loading the Paper Tray
• Printing a Startup Page
• Connecting the printer to your computer or network
• Printing with the 4650 Series laser printer
• Quick Web printing
• Printing envelopes, transparencies, and labels
SAFETY INSTRUCTIONS
To protect yourself and your equipment from possible
damage, always follow these precautions:
• Protect the printer from dampness or spills.
• Save the printer box and all packing materials that came
with your printer in case you need to ship it later.
• Lifting or moving the printer requires two adults!
• Read the installation instructions carefully before you
plug in your printer, and heed all warnings.
• Keep this user’s guide for reference.
• Keep the printer level at all times, especially when the
Fuser Oil Bottle is installed. Do not tilt more than 1.5°!
• The fuser area, under the Top and Back Covers is very
hot. Let the printer cool at least 15 minutes before
touching these areas.
WARNING! This printer is intended to be electrically
grounded. It comes with a three-wire grounding plug. This
plug will only fit a grounded AC outlet or power strip. This
is a safety feature. Do not defeat the purpose of the
grounding plug by removing the third pin.
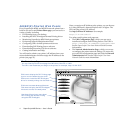
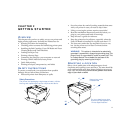
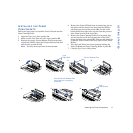
SELECTING A LOCATION
Select a level, stable place with adequate space for air
circulation and opening covers and trays. The area should be
well ventilated and away from direct sunlight or sources of
heat, cold, and humidity. Do not set the printer close to the
edge of your desk or table!
28”
10”
10”
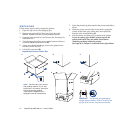
The printer and packaging weighs approximately 100 lbs.
Moving and unpacking the printer requires two adults.
Safety Precautions
Keep printer vents
unobstructed
For more details on printer
dimensions see Appendix A,
“Printer Specifications.”