


Replacing the Belt Cartridge 91
MAINTAINING YOUR PRINTER
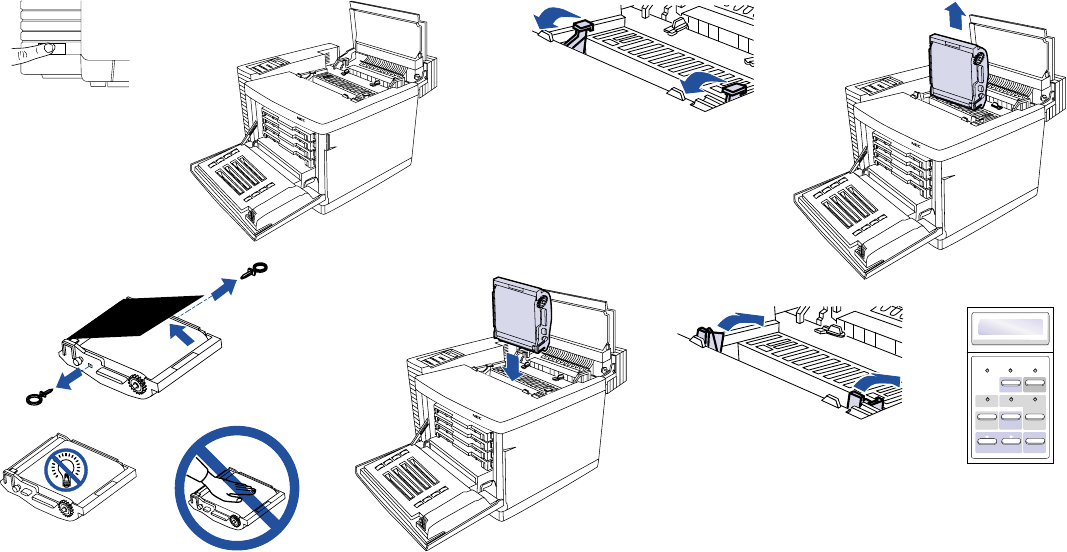
REPLACING THE BELT CARTRIDGE
Order Number 20-205
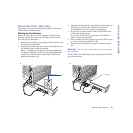
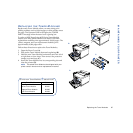
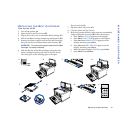
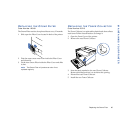
1. Turn off the printer (A).
2. Open the Front and Top Covers (B).
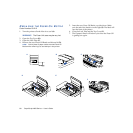
3. Flip up the Lock Levers to release the Belt Cartridge (C).
4. Pull the old Belt Cartridge straight up and discard it (D).
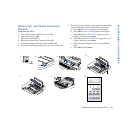
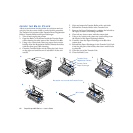
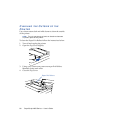
5. Remove the black wrapper from the new Belt Cartridge
and pull out the two tension release pins as shown (E).
WARNING! Do not touch the green material on the Belt
Cartridge. It is easily scratched.
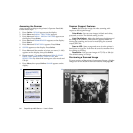
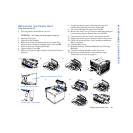
6. With the flat side of the Belt Cartridge facing the front,
insert it straight into the guide slots in the lock levers.
The white gear on the cartridge goes to the right.
Do not use force (F).
7. Flip down the Lock Levers (G).
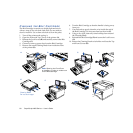
8. Close the Front and Top Covers.
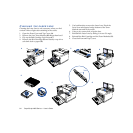
9. Reset the Operator Panel to make sure the consumables
usage information is current (H). Follow these steps:
a. Press Online. OFFLINE appears on the display.
b. Press Menu. PRINT FORM appears on the display.
c. Press Next until USAGE STATUS appears on the
display, and then press Select.
d. Press Next until BELT REPLACE? appears on the
display, and then press Select.
e. When the panel displays CONFIRM, press Select.
f. Press Menu. Press Online.
A
B
C
D
EFG
Power Warning Online
Menu OnLine
Data OHT Label
Feed Item Media
Previous Next
Select
H