


Replacing the Fuser Unit 93
MAINTAINING YOUR PRINTER
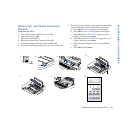
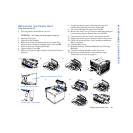
REPLACING THE FUSER UNIT
Order Number 20-219
1. Turn the printer off and allow it to cool.
WARNING! The Fuser Unit area may be very hot.
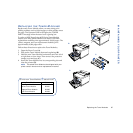
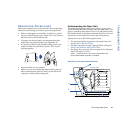
2. Open the Top Cover.
3. Open the Lock Tabs (A).
4. Remove the Fuser Oil Bottle and put in a plastic bag
temporarily or discard if replacing with a new one (B).
5. Remove the Fuser Cleaning Roller (C).
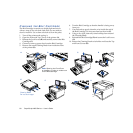
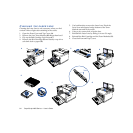
6. Open the Back Cover (D).
7. Place a clean piece of paper against the Transfer Drum to
protect it.
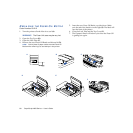
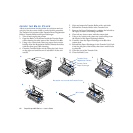
8. Loosen (but do not remove) the finger screws and
brackets that hold the Fuser Unit in place (E).
9. Lift out and discard the used Fuser Unit (F).
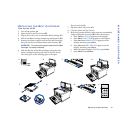
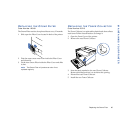
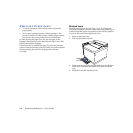
10. Remove the new Fuser Unit from its packaging and pull
out the orange Tension Release Pins on each side.
11. Carefully lower the new Fuser Unit into the slot (G).
12. Tighten the thumb screws inside the back of the printer.
13. Gently lift up on the Fuser Unit’s handles to make sure
that it is secured.
14. Close the Back Cover
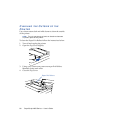
15. Reinstall the Fuser Oil Bottle (H) and Fuser Cleaning
Roller (I).
16. Close the Locking Tabs (J) and the Top Cover.
17. Reset the Operator Panel to make sure the usage
information is current. See page 74.
Loosen left Thumb Screw
Loosen right Thumb Screw
Paper to protect Transfer Drum
A
B
C
D
E
F
H
G
I
J