


54 SuperScript 4650 Series — User’s Guide
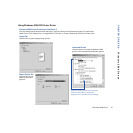
WINDOWS 3.1X
Installing the Printer Driver Software
Installation for Windows 3.1x (PostScript)
1. Boot your system and start Windows.
2. Insert the SuperScript 4650 Series CD into the appropriate
drive (in this example we use drive E:).
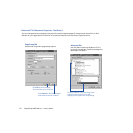
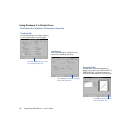
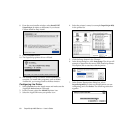
3. In the Windows Program Manager, select Run from the
File menu. Windows displays the Run dialog box.
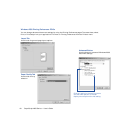
4. In the Run dialog box, click on the Browse button and
navigate to E:\WIN31\SS4650(NX)\PS\SETUP.EXE
5. Click the OK button. This launches the Installer.
6. Respond to the selections displayed in the installation
dialog boxes.
7. When installation is complete the installer will prompt
you to restart Windows.
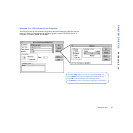
8. After Windows restarts, the Install PostScript Driver
From PPD dialog box appears.
9. Select NEC SuperScript 4650 PS. Click on Install.
10. When installation is complete, click on Close.
11. See “Setting Another Printer as Default” below and
follow the instructions.
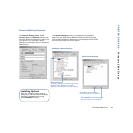
Installation for Windows 3.1x (PCL Driver)
1. For models 4650N(X) only. Boot your system and start
Windows.
2. Insert the SuperScript 4650 Series CD into the appropriate
drive (in this example we use drive D:).
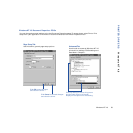
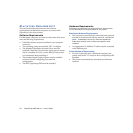
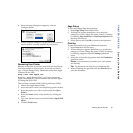
3. In the Main group, double-click on the Print Manager
icon. Click Options then Printer Setup.
4. Click on the Browse button and navigate to
D:\WIN31\SS4650N(X)\PCL\
Printing a Document
You can do this using the print command of the Windows
application used to create your document.
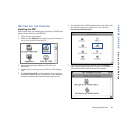
1. Open a document you wish to print.
2. Select Print from the File menu. The Print dialog box
appears.
3. Select the options you want in the Print dialog box,
including the number of copies and page range.
4. When the options are selected, click OK to print the
document.
Accessing the Printer Driver
You can access the printer driver from your application and
the Windows Control Panel.
From Your Application
Different applications have different methods for accessing a
printer driver. Below is one common example. If it does not
work with your application, consult your software manual.
1. Select Print from the File menu of your application.
2. In the Print dialog box that appears, click the Setup
button.
3. In the Print Setup dialog box that appears, select the
appropriate SuperScript printer driver in the Printers list
and then click the Setup button.
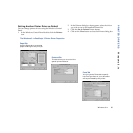
From the Windows Control Panel
1. In the Windows Control Panel double-click the Printers
icon.
2. In the Printers dialog box that appears, select the driver
you wish to view from the Installed Printers list. Then
click the Setup button.
Changing Settings in the Printer Driver
In the printer driver, you simply point and click to change
printer settings.
1. In the PostScript 3 driver, select a category of settings
that you want to change by clicking its name tab. In the
PCL5e driver, press the Options button to display more
settings.
2. Click on any setting to select it.
3. Click OK to save the changes you made in all property
sheets and close the printer driver.
Click Apply (PostScript driver only) to save the changes
you made in a property sheet. The printer driver remains
open.
Click Cancel to close the printer driver without changes.